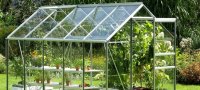
Do-it-yourself drip irrigation at the dacha. Video instruction. How to make drip irrigation at your dacha with your own hands? How to make drip irrigation from scrap materials

What is drip irrigation: features of the irrigation system
Drip irrigation is a system of regular and uniform provision of moisture to the root system of plants, which helps moisten the soil directly under the planting. This type of irrigation can significantly save water. The soil does not become excessively waterlogged and does not become waterlogged between rows, as happens with other water supply options. This promotes the active supply of oxygen to the root system, which has a beneficial effect on plant growth, thereby increasing productivity.

The drip irrigation system allows you to reduce the labor intensity of caring for green crops. And with an automated process, you can leave the area unattended for several days without worrying about the plants being left without water.
The equipment can be very diverse. But any system includes main pipelines for supplying and distributing water and outlet branches that supply water directly to the root system of each green space. The system is connected to a centralized water supply, storage tank (gravity-flow option) or to a pumping station. It can be equipped with automation, sometimes it is controlled manually. Depending on these criteria, system components are selected.
Components of an irrigation system and their characteristics
The main element of the system is the water supply source. It can be represented by a water supply system, a well or a water-measuring tank, which is installed at a height of at least 1.5 m. The next required element is a filter for drip irrigation with your own hands, thanks to which the system will not become clogged with various small debris.
The device can be vortex, disk or mesh. The latter option is considered more popular, which is due to its low cost. The vortex filter is used for irrigation systems of large areas. The disk element is characterized by excellent performance characteristics and high cost, which is not at all justified for small summer cottages.

If the source of water supply is a well or well, the system must be equipped with a pumping unit. The most appropriate option is considered to be a centrifugal type of device. The DIY drip irrigation distribution network consists of pipelines and hoses. For the main trunk network, metal or plastic pipes can be used. Metal products are strong, reliable and durable. However, the material is subject to corrosion, which will result in damage to the system.
Polyethylene or polypropylene pipelines are a more acceptable option. The products are characterized by strength, a smooth inner wall, which eliminates the possibility of deposits forming inside the system. Plastic pipes can withstand temperature fluctuations and the negative effects of aggressive substances.
DIY drip tapes for irrigation system
To organize outlets for each row, drip tapes in the form of a flat thin-walled tube, which has special devices for supplying water, are mainly used when arranging an irrigation system with your own hands. The tape is designed for pressure up to 1 bar. If it increases, the product may rupture. The maximum length of the tape is 100 m.

You can buy slotted or emitter drip tape. In the first option, there is a labyrinth along the entire length of the product, which distributes water evenly. At certain distances there are holes in it to release water. This type of belt is prone to clogging, so it requires the installation of a good filter.
Inside the emitter tape there are flat droppers equipped with a labyrinth system, thanks to which water is supplied to the plants. Emitters can be located at different distances in the range of 10-35 cm, which is determined by the type of crops being watered. The lower this value, the higher the cost of the product. Emitter tape is more reliable than slotted tape, and this is reflected in the cost of the product.
When choosing a tape, you should pay attention to its thickness, which affects the strength and durability of the product. The thinnest element will last no more than one season and is suitable exclusively for greenhouses.
Features of using drip tubes with external droppers
The drip tube is made of HDPE and is rigid and durable. It is produced without holes and is intended for self-installation of external drippers. The wall thickness of the product is 0.9-1.2 mm. The material is resistant to UV rays. The drip tube can withstand pressure up to 6 bar.

External drippers are used when organizing drip irrigation at a dacha individually for each plant. To ensure normal operation of the system, it is necessary to have high pressure in the network. These devices can be connected through thin hoses or connected directly to the drip pipe.
There are several types of external IVs. Compensated ones are used for uniform irrigation with a very long drip tape, as well as in areas with a slope. They operate exclusively from a pressure system. Less prone to contamination by small debris. Uncompensated devices are used with a short length of drip pipe and on flat areas. This option is used for gravity flow systems from a tank. They can operate at low network pressure. There are also dropper pegs that are used for spot watering. The product is installed in the root zone of the planting.
Helpful advice! For drip irrigation of tomatoes, cucumbers, eggplants and peppers, it is advisable to use drip tubes with external droppers.
The advantage of such pipes is that you can independently choose the installation step and regulate the volume of water released. The disadvantages include the high cost of the product (compared to drip tapes), the labor-intensive and time-consuming process of cleaning the droppers.

How to choose the right timers for drip irrigation
When installing automatic drip irrigation, you should set a timer. It performs the following functions:
- controls the irrigation system;
- controls the operation of the pump motor;
- starts and stops water supply;
- ensures the operation of several lines simultaneously.
The timer runs on batteries. When you change them, all programs on it are saved. The device can be equipped with a water meter function. There are mechanical and electronic timers. The first option operates on a spring, providing continuous watering for up to 24 hours. Mode adjustments are made manually. Any action cannot be programmed for an indefinite time. Such a device can be used for small areas where the irrigation process is constantly controlled by the owner.
An electronic timer allows you to program the process. The device has mechanical or software control. The first option is set for one week with a watering duration of no more than 2 hours. The innovative device is a program-controlled timer with 16 commands. It can be used to irrigate crops that have different watering regimes. The equipment is equipped with an air humidity sensor. This expensive option (in comparison with other devices) is recommended to be installed for watering large areas, as well as in greenhouses.

If the system is connected to a centralized water supply or pump, you should choose a device with a solenoid valve, and for watering from a barrel by gravity - with a ball valve.
How to make drip irrigation with your own hands from plastic pipes and hoses
When arranging a drip irrigation system from ready-made components, it is necessary to opt exclusively for high-quality products so that it lasts for many years and money is not wasted. The irrigation scheme should be quite simple, with a minimum number of connectors. At the junctions of elements, the pressure weakens, which contributes to the accumulation of small particles of debris.
Installation of the system is preceded by the creation of a layout diagram of all its component elements, and this, in turn, depends on the layout of the site and the location of the beds. The diagram should indicate the source of water supply, the main pipe and outlet hoses so that you can calculate the amount of materials needed. It is better to use a plastic barrel as a source of water supply for drip irrigation. This material does not corrode, which will not only increase the service life of the product, but also eliminate the possibility of clogging the system with rust particles.

A main pipeline, which can be made of metal or plastic, is connected to the water supply source. A more preferable option is to lay polypropylene drip irrigation pipes with your own hands. The main branch is located perpendicular to the beds and has a larger diameter than the outlet pipelines. All do-it-yourself drip irrigation elements made from plastic pipes are connected with compression fittings. After the shut-off valve of the water supply, a coarse filter is installed on the main line.
If drip tapes are used as outlet pipelines, then holes are drilled in the line for their fastening using starting fittings. The hoses are placed as close to the row of plants as possible. A plug is installed at the end of each tape. Next, the system is checked for functionality.
If you plan to lay the system underground, you need to dig a trench 30-70 cm deep under the pipelines. You need to fill the bottom with a layer of crushed stone and lay the assembled system. Next, it is tested, after which it is backfilled with soil. You can study the installation process in detail in the video of drip irrigation at the dacha.
Important! Drip irrigation pipelines laid underground are highly susceptible to clogging.

Drip irrigation from plastic bottles: features of the irrigation option
From plastic bottles and canisters you can make not only decorative elements for beautifying the territory. Of these, a full-fledged drip irrigation system is organized at the dacha site, which allows the soil to be moistened for 3-4 days.
Based on numerous reviews, it is advisable to perform drip irrigation from plastic bottles from containers with a volume of up to 2.5 liters. The saturation of water in the soil depends on the type of soil; this determines the number of holes in the container, thanks to which sufficient moisture will be ensured, which will eliminate the possibility of overfilling or underfilling. For example, sandy soils absorb moisture well. In this case, 1-2 holes in the bottle will be enough, and for heavy soils a larger number should be provided. Bottles with a capacity of 1 liter provide drip irrigation of cucumbers and tomatoes for 4-5 days, 3 liters for 10 days, 6 liters for 14-15 days.
It is advisable to organize drip irrigation using plastic containers in small areas. For large areas, it will take too much effort and time to refill the container with water.
Helpful advice! The plastic system can be used to feed and fertilize various crops.

The main advantages of creating drip irrigation from plastic containers:
- significant water savings;
- minimal financial costs for organizing the system;
- individual approach to each green space;
- simple installation, operation and maintenance;
- targeted supply of moisture and fertilizing.
The disadvantages of the system include the following:
- frequent clogging of the system due to the inability to install a filter;
- unaesthetic appearance of the site;
- constant manual replenishment of water;
- on the hot days of hot summer, the plastic system may not be able to adequately supply the plants with water.

Helpful advice! You can create a filter for each bottle by using nylon tights.
DIY methods for organizing drip irrigation from plastic bottles
There are several ways to create drip irrigation from plastic containers. The system can carry out surface and subsurface irrigation.
Underground homemade drip irrigation of roots using plastic bottles can be done in several ways. The most popular option is to dig containers between adjacent bushes to a depth of 10-15 cm, bottom down. Along the entire bottle, before it begins to narrow towards the neck, holes should be made using a gypsy needle or awl, 3 cm away from the bottom of the container. The average number of holes is 10-12 pcs. for containers of 2 liters. A container wrapped in thin fabric is dug into a previously prepared hole, filled with water and closed with a lid.
As the container is emptied, which occurs under the pressure of the earth, it may become deformed. To avoid this, you should pierce a hole in the lid to equalize the pressure, and you should also replenish water supplies in a timely manner.

Another similar option is to place the container with the lid down. To use this method, you need to cut off the bottom of the bottle and screw the cap onto the neck. Holes are made throughout the entire area of the container, not reaching the top by 2-3 cm. The bottle, pre-wrapped in gauze, is placed in the hole and filled with water. To prevent debris from falling into the water, the container is covered on top with a previously cut bottom.
Do-it-yourself subsoil drip irrigation for your dacha can be organized using special oblong-shaped nozzles with holes. They can be bought in specialized stores for summer residents and gardeners. The nozzle is screwed onto the neck of the container instead of the lid. In this case, you should use bottles with a capacity of up to 2.5 liters, since there are no such devices for containers of 5-6 liters. The bottle, neck down, is inserted into the ground to the depth of the nozzle. The bottom of the container does not need to be cut off. After emptying the container, the tip is unscrewed, it is filled with water, and the manipulation is repeated.
Do-it-yourself root and surface drip irrigation from bottles
Using plastic containers, you can carry out root drip watering of the garden, directing drops of water directly under the root of each plant. For this method, it is better to choose a 1.5 liter container. A hole is made in the central part of the lid using a nail. Next, you should cut the bottom of the bottle at an angle of 30-40 degrees. The container itself will be located at the same inclination relative to the ground. The container is secured with several sticks and tape as close to the bush as possible, tilting the neck in such a way as to ensure that water gets directly under the rhizome.
Another option, often used in a greenhouse, involves watering the plant from a distance. To do this, take a small container and a regular ballpoint pen, previously cleaned of paste residues with gasoline or solvent. One end of it is tightly closed with a toothpick or match. The other is inserted into the opening of the bottle. It is better to seal the joint with plasticine.

It is necessary to make holes in the rod, the number and size of which will depend on the required intensity of moistening. It is directed to the root of the plant, depending on which the bottle is dug into the ground to the required depth. The container is filled with water and closed with a lid.
For a small area, you can make a hanging system. To do this, a support is built over the bushes, a metal rod or wire is stretched, from which the bottles will be suspended. A series of small holes should be made in the bottom or lid of the container, which depends on its location. The main advantage of this method is that the water will flow to the plant warm due to the fact that it is heated by the sun.
The container is hung above the bed at a height of 30-50 cm from ground level. The location of the bottle should be chosen based on the optimal contact of drops under the plant, and not on its leaves.
Helpful advice! You shouldn't make a lot of holes at once. They can be added as needed to increase water supply.

Do-it-yourself drip irrigation for your dacha at no cost: do it yourself from medical droppers
Another economical option is to install a drip irrigation system using medical droppers. It is rational to arrange it in areas with different varieties of crops, which should be watered in different quantities. This procedure is made possible due to the fact that the droppers are equipped with special control wheels that allow you to select the required intensity of liquid flow. The disadvantage of such a system is that the droppers quickly become clogged, which requires periodic flushing.
To create a drip irrigation system with your own hands, you should prepare:
- disposable medical droppers;
- hoses for distributing water over the beds;
- connecting and shut-off valves for droppers and hoses.
Helpful advice! It is recommended to choose all components in a dark color, which will prevent water from blooming in the system.

Before installing such a device, you should display on a piece of paper a drip irrigation scheme, which is carried out based on the location of the beds where irrigation should be provided. Based on this, surface distribution of supply pipes is carried out on the site. For this you can use polyethylene or rubber products. All elements are connected using tees. A plug must be installed at the end of each hose.
The system can be connected from a centralized water supply or from a storage tank located at a certain height. Also in this case, you can create automatic watering by installing a timer or controller at the beginning of the system. A hole is made in the distribution pipes opposite each plant into which the plastic end of the dropper is inserted. Tubes of elements are placed under each bush.
Helpful advice! In order for the drip irrigation system from medical droppers to last as long as possible, a fine filter should be installed at the very beginning (after the water supply source).
Review of ready-made drip irrigation systems, their characteristics
The Zhuk drip irrigation system from a domestic manufacturer is one of the most popular among gardeners. It can be connected to a centralized water supply or to a storage tank. If you use the latter option, the kit includes a level tube, through which you can control the amount of water remaining in the barrel. Manufacturers produce “Zhuk” drip irrigation systems for 60 plants and 30 plantings. Usually the device is equipped with a timer and a filter. You can additionally buy “Zhuk” drip irrigation, designed for 20 plants.

“Kaplya” irrigation kits are equipped with emitter tapes with dropper pitches of 0.3 m. Thanks to the complex labyrinth of channels inside the dropper, the possibility of clogging is eliminated. The system is designed for an area of 25 m2. Can be connected to both a water supply and a storage tank. The controller is not included in the set.
A more reliable analogue of the Zhuk irrigation system is the Water Strider model, which is designed for drip irrigation of small greenhouses. The set consists of a 12 m long hose, a controller, 40 drippers and connecting elements. The system is organized for watering exclusively from the container, since the operating pressure in the network should not exceed 1 bar. The barrel is most often located at a height of 50 m.
The Belarusian drip irrigation system “Akvadusya” has several varieties suitable for watering areas of different sizes. It can be equipped with or without a controller, connected to a water supply or storage tank.
Drip irrigation "Urozhay"-1 is also produced with long-length emitter tapes. The system can be additionally equipped with a filter and automation. Another budget option is the Pomodor drip irrigation system with drip tubes, external drippers and a timer. The kit also includes special splitters to facilitate installation of the system. The most expensive model contains a controller and a submersible pump.

The Istok irrigation system includes a 25 m drip tube with a pitch between droppers of 30 cm. The device is equipped with a filter and fittings necessary for connection to a storage tank. Some models are equipped with a controller and pump.
Today you can buy a drip irrigation system, which includes all possible elements. But such a solution requires significant financial costs. A more economical option is to create such a mechanism from ready-made components. In addition, you can make your own irrigation system for your dacha using scrap materials, such as plastic bottles and medical droppers. The choice depends on the nature of the territory, its area, the number and type of green spaces, personal preferences and financial capabilities of the owner.
Do-it-yourself drip irrigation at your dacha: video story
All gardeners know how important watering the garden is. However, watering a garden is a rather labor-intensive process; for this reason, today gardeners and summer residents are interested in how to make drip irrigation.
After all, by assembling a drip irrigation system with your own hands, you can simultaneously solve several problems, save money, time, and get an excellent harvest from your plot. Because the drip irrigation system evenly distributes moisture and fertilizer throughout the entire garden plot.

In our industrial age, there are several completely different drip irrigation designs.

Device for giving
Most summer residents are interested in the question of how to organize drip irrigation with their own hands? Having decided to assemble a drip irrigation structure with your own hands, you need to take into account some nuances, and above all those relating to water resource reserves, because there should be enough water to charge the siphon.
In this situation, a siphon can be an arc-shaped pipe installed vertically, with one end connected to a tank filled with water, and the other end connected to a pipeline.

Moreover, the siphon must have a height corresponding to the volume of liquid in the tank.

The design of irrigation for a dacha looks like this: water from the tank flows into watering hoses, in which holes of a certain diameter are cut to spray water resources. This irrigation design can take a variety of forms.

As an example, we can consider watering shrubs, for which a ring irrigation structure is created, and a rectangular irrigation system from a standard pipeline is excellent for vegetable plantings.

Watering is regulated using a special system, which includes a rain valve, several springs, a lever, a pusher, and a tank lid.

The valve will operate if a recess is created on the tank lid for rain, which acts as a weight. The rain catch valve works on the same principle as the toilet cistern flush system.
When creating the actual design of drip irrigation, it is necessary to take into account certain features of planting and development of the roots of seedlings for each specific type of planting. Because the speed of liquid movement depends primarily on the exact depth at which the roots of the planted plants are located.

So, the deeper the roots go into the ground, the slower the flow of moisture. And plants with shallow roots are more susceptible to drought.

However, the roots of most green spaces are located at a depth not exceeding 20-25 cm, so drip irrigation in a greenhouse requires the use of less water, unlike fruit trees.

Automatic design
The automated design of drip irrigation is convenient in that it allows you to water every day, at a specified hour, without your presence. The fact is that this system will automatically turn on and off at the right time.
How to make drip irrigation for your dacha automatic?
Creating the design of an automatic drip irrigation system must begin with the fact that the pump must be connected to a hose, in which through holes must first be made. Water will flow freely through these holes.

The gap between the holes should be 30-35 cm. Next, the hose must be routed throughout the entire area. When setting the start time for irrigation, you need to take into account such a parameter as pump power.

The drip irrigation system is ideal for the lawn, because the roots of the grass are usually located at a depth of no more than 15 cm. Moreover, in the summer, the lawn simply needs regular watering, otherwise you risk, at a minimum, losing the attractiveness of the lawn, and otherwise it can lead to complete lawn loss.
Note!


Considering the financial costs of planting new grass, automatic watering seems quite justified.

However, when organizing an automated design, as in the photo of drip irrigation, it is necessary to take into account some design features.
Thus, there are cases when there is excess water in the nearest area, but no water has arrived in the farthest area. In addition, there are situations when powerful water pressure, when pumped, leads to waterlogging.

A special dispenser, purchased at any gardening center or assembled with your own hands from a plastic bottle, can solve this issue.

A so-called drip irrigation from bottles is formed, the effect of which is similar to the operation of a toilet flush barrel.

Note!

This design element will provide you with the rate of liquid flow into each bed, and individually to each root of the seedling.
In the automatic irrigation design, the leading place is given to the dripper mounted on the pipeline system. It is through this device that the liquid is supplied directly to the root system.

If, when assembling an automated irrigation structure, you decide to save a little on costs, then it is acceptable to replace the droppers with plastic parts from the medical system kit.

However, the best option is ready-made drippers with a mechanism for regulating water pressure, which are available for sale in specialized stores.

DIY drip irrigation photo


Note!


Drip irrigation evenly and promptly moistens the soil, supplies plants with nutrients, and does not erode the fertile layer. The method is popular for growing vegetables, fruit trees and shrubs. Its use even on poor soils and in arid climates allows you to get a rich harvest. Using the advice of experienced craftsmen and available tools, it is not difficult to create drip irrigation with your own hands for your personal farm.
The main advantage of the drip irrigation system is the targeted, economical supply of water to the plant in uniform volumes. In this case, the roots of the crop are directly moistened through the holes in the hoses. Supply is carried out in two ways: into the soil, to the rhizome using droppers, or to the surface through hoses - a special watering tape.
Drip irrigation is distinguished by the method of water supply:
- Forced. The water is under pressure from a circulation pump or water supply. The system is equipped with a reducer - a pressure meter and regulator, the upper value of which in a drip system is no more than 2 atmospheres.
- Using gravity. From a tank filled with water, under the influence of gravity, water flows to the plants. The tank or container is located approximately 2 meters above ground level.
To supply water to crops requiring irrigation, pipelines with specially mounted splitters are used. The pipes are placed and secured along the perimeter of the site, along the walls of the greenhouse, in prepared furrows. The filter at the outlet of the water supply or tank prevents blockages in watering ribbons and holes. The valve controls the water supply.

Advantages and disadvantages
The advantages of the drip irrigation system were appreciated by gardeners and gardeners who tested it in action.
Advantages of drip irrigation:
- Moisture goes directly to the root and does not touch the stem, protecting the plant from fungal diseases.
- With careful, uniform moisture, the soil near the crop remains loose and saturated with oxygen. The water does not stagnate and does not compress the soil, as happens with the conventional irrigation method.
- The result of drip irrigation is similar to natural humidification.
- Water is supplied in such a way that the soil is moistened as needed, not overdried, or flooded.
- Drip humidification is used to safely feed plants.
- Water for irrigation is used sparingly.
The use of drip irrigation makes the farmer's work easier, and so significantly that it leaves no room for analyzing the shortcomings of the system. And they are:
- Moistening a limited area of soil does not stimulate the root system to strengthen, grow wider and deeper, which reduces the effectiveness of fertilizers. When applying increased amounts of them, only part of them is effective in a moist area of soil, that is, near the drip. The remaining amount of useful elements is useless or harmful to the soil. The solution to the problem is to install 3-4 droppers around the plant. But this increases the cost of the system.
- Insufficient hydration. A healthy plant requires approximately 10 cm of moist soil. It is created in 2-3 hours of operation of a drip irrigation system. If the water has not penetrated to the required depth, the root of the plant does not receive the necessary nutrition and required moisture. The solution to the problem is to determine in a practical way the relationship between the depth of moistening and the time of watering before using the system.

Calculation of consumables
Correctly installed perforated hoses are spaced at intervals of no more than 30 cm. High-quality moistening of the soil and root system occurs in about 2 hours. Approximate water consumption per 1 sq. meter - 20-30 liters. A longer time for watering means excessive consumption of water, as well as waterlogging of the soil, leading to diseases and rotting of the roots.
DIY drip irrigation system
To correctly calculate the irrigation structure, the area requiring irrigation is taken into account. The length and location of the pipes and the volume of the gravity system storage depend on it. If drip irrigation is forced, using a well pump or water supply, it can be controlled manually or automatically, provided that a water supply controller is installed.
The capacity of the irrigation tank is calculated using the formula: volume of required liquid for 1 sq. meters (about 20–30 l) multiplied by the irrigation area.
Design
Creating a home watering system begins with developing a plan. You can choose a stationary one - for perennial crops, or a portable model - for annual crops. Irrigation in greenhouses is suitable for growing cucumbers, tomatoes, peppers, and strawberries.
Irrigation system plan for the site
Planning the irrigation system on the site:
- 1. A diagram of the greenhouse with dimensions (length, width) contains an image of the beds and the location of the plants. Required to calculate the length and select the type of garden hoses.
- 2. Water is supplied to the site through plastic pipes; they are conveniently located around the perimeter of the greenhouse.
- 3. The pipes are equipped with fasteners and fittings for further installation. To create a portable, mobile system, flexible garden hoses are used; to install a stationary system, hoses with a rigid structure or plastic pipes are used.
- 4. The water tank is placed in a place convenient for collecting and distributing water, at a sufficient height for the correct operation of the gravitational system. Gardeners agree that a water supply of at least 100 liters is required.
- 5. Calculation of the length of hoses, the number of accessories and spare parts is made according to the planting scheme. These include pipes and flexible hoses, fittings, shut-off valves, plugs, and adapters. When planning an automatic irrigation system, regulators and a water supply controller are purchased.
After calculations and preparation of materials, installation of the irrigation system begins. A home tool kit will do.
Installation of simple drip irrigation
An example of creating a drip irrigation system for one plant:

The system is installed in three ways to choose from:
- 1. Using a watering tape with holes is convenient. It will last up to 10 years in a greenhouse or indoors, but is susceptible to the destructive effects of ultraviolet radiation.
- 2. The second way is to make holes in the flexible hose yourself using a heated nail, an awl, or a thin drill.
- 3. The third option is to use additional thin hose outlets with holes up to 30 cm long and up to 4 mm in diameter. The advantages of this method are mobility and the ability to move the device as the plant grows. There is no need to plant crops in even rows.
For open ground
Installation is carried out according to a similar scheme, but taking into account the following features:
- Plantings in open ground exceed the area in greenhouses, which increases the amount of water required for irrigation. Requires connection to water supply or well.
- Water supply lines and hoses that are constantly outdoors must be resistant to temperature changes and still be able to maintain working condition.
- To water large areas, it is advisable to use a pump and a hydraulic accumulator, which maintain the required pressure in the system and regulate the water supply.
From infusion medical systems
Medical drippers do an excellent job of garden watering. They have rubber adapters that are conveniently inserted into the main hose, as well as ready-made water supply intensity regulators.
Drip irrigation using medical systems
Irrigation installation diagram:
- The number of drippers is equal to the number of plants that require watering.
- Inlet holes are created in the main hose according to the diameter of the drip tubes.
- Connections and branching of hoses using fittings of the required size.
- Sections of hoses with plugs at the ends are laid out along the plants along the length of the furrows.
- Rubber tips of medical systems are inserted into prepared holes in the main hoses.
- The other ends, where the plastic needles are placed, are located near the root of the plant.
The first start of water will allow you to evaluate the intensity of the pressure, which can be adjusted later. If a tank is used for irrigation, its top should be protected from direct sunlight to prevent contamination of the filter and hoses.
From plastic bottles
The simplest option for drip supplying water to the root is to use plastic bottles. This is an elementary, profitable and reliable device that serves well in greenhouses and open ground. The summer sun heats the water, and at night the earth continues to be moistened with warm water.
Bottle irrigation system
A peculiarity of using the method when moistening dense clay soils is the need to monitor the cleanliness of the device’s holes. In dry times, plants require periodic heavy watering in addition to drip irrigation. The disadvantages include the difficulty of servicing large areas.
The device is cheaper than a ready-made kit, but is not inferior to it in terms of efficiency. The choice of bottle size is based on the size of the plant and its need for moisture. Containers from 1 to 5 liters are used. The amount of watering time that will last depends on the size and number of holes. To create them, nails, an awl, and a needle are used. Use a nylon stocking or fabric as a filter.
Relationship between bottle volume and watering time^
Installation options:
- 1. Select a bottle that corresponds to the distance between plants and dig it into the ground with the neck up. To irrigate one bush, you can use a small container with holes made in the direction of the plant's root. They bury it in the ground next to the bush and fill it with water. Nylon is used as a filter. After this, water begins to flow into the soil and moisturize the root system.
- 2. The bottle is hung upside down on a crossbar or convenient holder up to half a meter high. A uniform supply of water occurs through the holes in the bottle cap.
- 3. The container is placed in the ground, neck down, with holes made. This technique helps deliver water directly to the depth of the root. The peculiarity of the method is that the lid should not be lower than the root in order for the moisturizing to act strictly as intended.
- 4. Special nozzle with ready-made holes. It easily screws onto the bottle. The method is simple and convenient. The nozzle is convenient to place in the ground and remove for cleaning and filling the bottle with water. The disadvantage of this method is the single size of the nozzle, suitable for use in bottles with a capacity of no more than two liters.
Liquid nutrients and fertilizers are poured into a bottle in a diluted state. The proportions for the correct solution are indicated in the instructions for each fertilizer. Feeding the plant will be uniform and distributed along the entire length of the root.
Underground drip irrigation
The root system of garden crops is shallow, located closer to the soil surface. The distribution pipes of the irrigation system are placed taking this factor into account - no deeper than 2 shovels. If the pipeline is located at a shallower depth, there is a possibility of damage during cultivation and digging.
Subsoil moistening device
Arrangement of underground irrigation involves planning the placement of plantings for several seasons, so that the plants are located close to a source of moisture. The watering device is not intended for free movement within the area.
A preliminary design of the system will help to correctly calculate the amount of materials required, the location of the trenches and the drainage layer. The following are placed in the recesses prepared according to the diagram:
- a layer of polyethylene film;
- perforated pipes or hoses;
- drainage (crushed stone, gravel, expanded clay);
- priming.
It is recommended to make perforated pipes yourself, since production ones have too large holes. The perforation diameter should be up to 20 mm, the step between them should be no more than 40 cm. Clogging of nozzles during underground irrigation is inevitable. A cheaper filtration option is nylon tights, while a professional approach uses geo-fabric.
The water storage tank is raised to a height sufficient to create high-quality water circulation. Depending on the length of the system, the approximate height of the tank placement is at least 2 meters.
Underground irrigation system for garden and vineyards
Orchards and vineyards that require constant watering are distinguished by a deep and powerful root system, going 1 meter or more deep. To moisten garden trees, pits are created near them by drilling. The recess is filled one-third with drainage (crushed stone, expanded clay).

A vertical pipe up to 5 cm in diameter is installed, with holes, a filter and a plug at the bottom. The size of the hole depends on the age of the plant and the size of the roots. For young trees it is possible to use a depth of up to 72 cm, for mature plants with a powerful root system - up to 1 meter.
Vertically installed pipes or hoses are combined into a single network by main pipelines coming out of the water storage tank or connected to the water supply. If it is not possible to install a general system, the vertical pipes at the roots are filled with water manually. To avoid blockages, the upper part of the pipes is closed with a lid or plug.
Automation of subsurface irrigation
Connecting the system to a well pump or water supply, as well as installing a timer and controller, makes automation possible. The device allows you to set a program to independently turn on and off watering.
The water storage is a plastic canister, bucket, bottles with a volume of more than 50 liters. Medical infusion systems are used as watering hoses - cheap, durable and reliable devices. There are two options for arranging home drip irrigation:
- 1. The systems are placed inside a storage tank with water through the top. The complexity of this option is starting the dropper, getting water inside the hose and adjusting the water supply.
- 2. Drilling holes in the bottom of the storage tank and fixing the distribution hoses in them. Since the diameter of the outlets should be smaller than the diameter of the hoses, it is easier to insert the latter into the holes heated in hot water. After cooling, a tight connection is created, and the outlets are additionally sealed.
Making a home automatic watering system using the second option will take more time, but the result will be a reliable device that can be used not only to moisten the soil, but also to feed plants.
In order for plants to thrive in the garden or greenhouse, they need to be provided with good lighting and proper, even watering. Therefore, every gardener tries to create the most comfortable conditions for all representatives of the flora that grow on the site. And if everything is more or less clear, then what about watering? You've probably heard more than once that simply pouring water from a hose is harmful to plants. That is why many people are thinking about a more gentle type of moisture supply to crops. A do-it-yourself drip irrigation system is quite simple to make, but there are a huge number of advantages from using it.
What is drip irrigation, how to turn it into a “system” and what advantages can it have? Before we answer these questions, let’s figure out why heavy watering with a hose is so harmful to plants. Most people are even willing to water the plantings manually from jars rather than use a hose.

And all because:
- the pressure of the jet from the hose erodes the soil around the stem and roots of plants, which crops really don’t like;
- the soil around the plants receives too much water, which negatively affects the process of natural aeration - the air that the roots need is simply pushed out of the soil by water;
- If you water the garden with a hose, the water consumption will be very high; this indicator is extremely important for those garden plots where water is brought by water tankers, but for some reason there is no water supply system and wells;
- Because of excess moisture in the soil, plants begin to grow poorly, become sick, their roots rot, and eventually the plantings die.

These are the main reasons why many gardeners are increasingly thinking about installing a drip irrigation system in their summer cottage. Drip irrigation is truly a win-win option for both greenhouses and open ground. It is a system of water hoses, which are connected at one end to a reservoir of water, and with many other ends of the branches dug into the ground right next to the root system of each plant individually. That is, many thin hoses are necessarily diverted from the main, main one, and each goes to a separate plant.

On a note! Such a system can be equipped for absolutely any crop. But most often, summer residents provide drip irrigation for peppers and other, more capricious plants.

As a rule, such a system cannot be universal for every garden. Typically, a separate drip irrigation plan is drawn up for each site. It will indicate all the plantings that need a gentle supply of water, and all hoses will be laid in accordance with this plan. This is probably the main drawback of the drip irrigation system - you can’t just go to the store and buy the first kit you come across for installing this device. By the way, that’s why many people do everything with their own hands.

Benefits of drip irrigation
- Water is supplied directly to the root of the plant without affecting the stem, which means it does not expose the crop to the risk of plant diseases associated with excessive moisture.


On a note! It was with the help of the drip irrigation system that it was once possible to turn dried-up Israel into a blooming oasis, in which gardening is now widely developed. So drip irrigation is time-tested.
Most likely, after reading the beginning of the article, you are inspired and are already thinking about going to the store for a drip irrigation system. But don’t rush: first, first you need to draw up an irrigation plan and use it to calculate how many meters of hoses you will need. And secondly, drip irrigation is faster and easier to do with your own hands.

Prices for drip irrigation systems
drip irrigation system
What can drip irrigation be made from?
Knowing the basic principle of operation of a drip irrigation system, it will not be difficult for an imaginative gardener to come up with what this device can be made of. The system typically consists of a large water tank mounted on an elevated surface. A long main hose is connected to it in the lower part using taps, to which, in accordance with the irrigation scheme, hoses with a smaller cross-section are connected through fittings. And the ends of small water conduits are dug directly under the root of each plant or fixed so that the moisture from them drips directly along the stem onto the ground.

On a note! It’s good if you take care of the presence of a filter in the irrigation system. The fact is that various debris can get into the water (if the tank is open), which will quickly render the hoses unusable by clogging them. Everything will have to be redone to make the system work again.

This is what a drip irrigation system looks like. It can be complicated and equipped with a controller, or, conversely, simplified.
Table. Ideas for a DIY Drip Irrigation System.
| Material | Description |
|---|---|
| The most familiar and understandable way. You will need a thick watering hose and thin water conduits with a diameter approximately the same as the air supply hose of a conventional pump for wheels and balls. The entire system is connected, as in the case of industrial installation, using fittings. |
| There can be two scenarios here - the bottles can be hung near the plants or dug into the ground. In the first case, they are equipped with droppers, in the second, a lot of holes are made in them, and the upper part is cut off. The system is inconvenient because you have to add water to the bottles. |
| It is very easy to make drip irrigation from this material. Droppers are an affordable material; they can be purchased at a pharmacy or asked from a medical professional you know. |


The device looks like this: a plastic bottle with small diameter holes is dug in near each individual plant in the greenhouse. The bottle is filled with water, which seeps through small holes and nourishes the roots of the plants.

There are also many modifications of the listed ideas that can be improved or, conversely, simplified. Let's consider creating a drip irrigation system from ordinary medical droppers.

Materials for a dripper irrigation system
Where does the installation of an irrigation system begin? And it begins with developing an irrigation scheme and acquiring the necessary materials. The plan should reflect the complete layout of your site, and not just show the location of the house and greenhouse, but also show all the garden plantings. But this is the case if you decide to equip your entire garden with a drip irrigation system. To equip an irrigation system for a small plot - for example, three strawberry beds - it will be enough to draw up a detailed diagram of these same beds. The diagram also indicates the location where the water tank will be installed.

On a note! Try to transfer the most accurate dimensions to the drawing - this will simplify the calculation of the amount of materials needed. Measure everything with a tape measure.

Materials needed to make a drip irrigation system:
- water tank- as a rule, this is a large plastic tank; It is better not to use metal, as it will begin to rust over time, and rust particles will clog thin hoses, which will lead to damage to the entire system; in this case, the tank must be opaque, otherwise the water will quickly bloom;
- main pipe- it is best to use plastic, as it will last longer; the tube will be connected to a water tank, you can also use a hose;
- medical droppers in an amount equal to the number of bushes that need watering;
- ball valve, opening the flow of water;
- filter, ensuring the purity of the water entering the droppers;
- fitting for branching hoses;
- stub for main hose.
On a note! The water tank must be located at a certain height, so you should immediately take care of the presence of a stand for it. The optimal height for raising the tank is 2-2.5 meters.

Installation of a dripper irrigation system
So, the materials have been purchased, plans have been drawn up - it’s time to start making a drip irrigation system from drippers.
Step 1. It is necessary to make a hole for water outlet in the tank. To do this, cut a hole for the ball valve a few centimeters from the bottom of the tank and install the latter using seals and a coupling so that water does not leak out.

On a note! If you plan to install a filter in your system, it is best to install it at the water outlet from the tank so that all debris that gets into the water does not clog the tap and hoses. Instead of a filter, you can use a piece of foam rubber, but it will need to be changed regularly.
Step 2. In the hoses that will be located between the bushes, we make holes of such a diameter that the ends of the droppers will be held inside. The number of holes will be equal to the number of plants being watered.

Step 3. We connect the main main hose to the tap, to which, according to the diagram, we also connect those that will be located between the rows of bushes. The connection is made using splitter fittings.

Step 4. We stretch the hose system and lay it between the rows.

Step 5. We close the ends of the main hoses with plugs to prevent water from spilling out.

Step 6. We remove the needles from medical droppers, leaving the rubber tips in place.
Step 9 Open the tap and allow water to enter the system.
Step 10 Using a regulator with a wheel on the droppers, we control the flow of water, adjusting the intensity.


On a note! Be sure to cover the water tank with something from the sun's rays to prevent the water from blooming. Otherwise, microalgae will grow in the tank, which will quickly contaminate the filter.
Video - Installation of drip irrigation from drippers
You are convinced that making a drip irrigation system yourself is not difficult. How much cheaper it is than buying a ready-made one remains an open question. This will be easy for those who have medical workers in the family or people who can buy IVs at a discounted or wholesale price. Otherwise, the system may turn out to be quite expensive.

And finally, I would like to give some tips on using drip irrigation that will extend its service life and make it easier for you to use.
- The reservoir should only be filled with clean water to keep the filter clean for as long as possible.
- By the way, you need to clean the filter weekly even if you fill it with clean water.
- Before you first start using your drip irrigation system for its intended purpose, flush it and see if everything is working correctly. It is better to eliminate shortcomings immediately, if any.

Now you fully understand what drip irrigation is, why it is needed, and how to assemble it from ordinary droppers. The system is not complicated, but very functional. That is why do not waste your time now, so as not to run around with buckets later.
Video - How drip irrigation from drippers works


- The meaning of the name Yaroslav, origin, character and fate
- How do people become terrorists?
- A simple recipe for cookies through a meat grinder
- Shortbread cookies through a meat grinder Margarine cookies through a meat grinder
- Recipe: Turkey Chop Schnitzel - Breaded with Breadcrumbs
- "Napoleon" from lavash with custard Napoleon from lavash with custard
- Bream fried in a frying pan How to properly fry bream in a frying pan
- Delicious and healthy yogurt-based cakes
- Beef jellied recipe with photos step by step with gelatin Beef jellied with gelatin portions
- How to cook liver with potatoes
- Waffle cakes with herring – delicious!
- Kliment Efremovich Voroshilov
- Hieromartyr Hermogenes, Bishop of Tobolsk and Siberia and the murdered priest Peter Karelin like him At the Tobolsk See
- Russian statesman, Minister of Internal Affairs Vyacheslav Konstantinovich Plehve was born. What are the main areas of activity of Plehve V
- Sergey Yesenin - I've never been this tired before
- Myra Lycian - the place of sanctification of St. Nicholas the Wonderworker Temple of St. Nicholas the Wonderworker in the world
- English money: history and interesting facts What money is in Great Britain
- Ceres, ancient Roman goddess The art of agriculture from Ceres
- Who is Viktor Bout really?
- Cardinal Chen: “The Vatican Secretary of State is a man of little faith with erroneous opinions Who is considered young in relation to cardinals