Syberia 1 walkthrough. SyberiaSiberia. Hotel access codes
Walkthrough
WalkthroughSyberia
complete walkthrough
Smart Girl, [email protected]
Ladies and gentlemen, sit down comfortably, because we are starting an exciting and by no means short journey on our Trans-Siberian Express... hmm, I’m saying something wrong... oh, yes, of course, first you must follow all the rules for boarding the train - get the right to travel and buy a ticket. And don't look at me like that, I'm just following orders... Next! This exciting game, with such a sweet name for the Russian heart, can bring a lot of trouble and a lot of pleasure from the very first minutes, or whatever seconds. Before you start reading the walkthrough, try to do without it, believe me, solving puzzles yourself is much more interesting than using someone else’s ready-made solution. And so we begin!
Walkthrough
 Walkthrough
 Start of the game
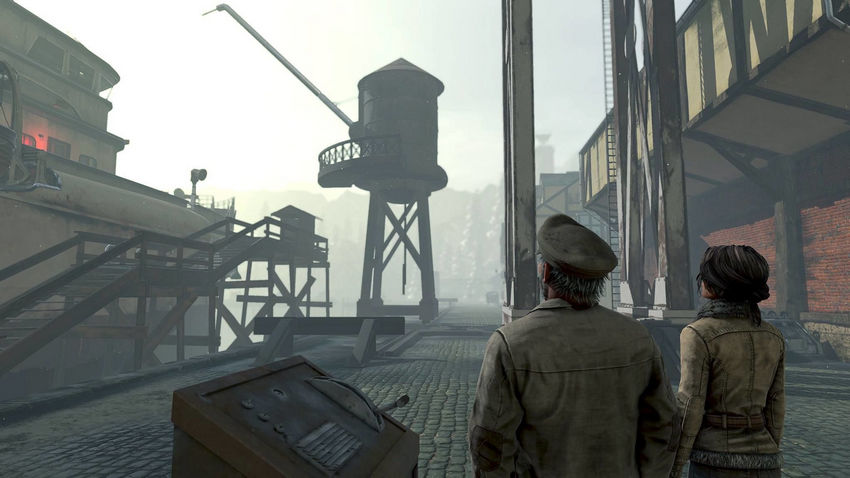
We find ourselves in the small French village of Valadilene, where we are greeted by disgusting, spring-like wet and chilly weather. Our heroine, Kate Walker (Katya Volkova), stands near the road, looking at an unusual funeral procession, consisting exclusively of wind-up toys and robot twins. A legitimate question arises: is someone being buried or is the coffin also fake? In short, Kate is intrigued, and so are we. The gates to the cemetery slam shut right in front of our noses, and there is nothing else left to do but go in search of a hotel.Hotel
Immediately in front of the entrance, there is an advertising brochure on the stand, which tells about the company of mechanical toys, for which Kate came from America itself to conclude an agreement to purchase it. You should take the brochure, it will come in handy later. Once you are convinced that all escape routes are blocked: the weather is raging outside, the suitcases are too heavy for Kate to carry them on herself, and the hotel owner is nowhere to be found, you can begin to take active action. First of all, talk to the boy named Momo, who is carefully scratching something on the table. Then return to the desk. Examine the table carefully, there should be a reception bell key there. Take it and use it on the figure with the hammer in his hands. Click on the red button nearby. The bell will ring and the hotel owner will appear. Talk to the inn owner. Ask him about Momo. After the hotel owner drives the boy away, he will take Kate to room number 6 and at the same time bring her suitcase. A fax from Kate's boss is waiting for you in your room, which lies on the table next to the bed. Take it and read it. Call the office on your cell phone and your boss, Mr. Marson, will send a second fax with a welcome message to the local notary. After this you can go downstairs into the hall.In the lobby, talk to the hotel owner, from whom you will receive a second fax and some information about the village and its inhabitants. From him you will learn that the owner of the mechanical toy factory, Anna Voralberg, died a couple of days ago, and an unusual funeral procession, consisting of automatons (in our opinion, robots) saw off the old lady on her last journey. Then go to the table where Momo was sitting and pick up two cog wheels from the floor, and two more from the table. Leave the hotel.
Valadilein
On the street, turn left and walk two screens, past the bakery. The bakery is of no use, since all the shops are closed due to mourning. Get to the notary's house, in front of him there is a bench on which lies the latest issue of the local newspaper.Notary's house
Go up the stairs to the front door. Next to the door there is an automaton built into the wall. Pull the lever located in the middle of the robot's chest to connect the head and body. Then place Mr. Marson's welcome letter in your outstretched hand. The notary, Mr. Alfolter, will let you into the house. Go to his office and sit in the chair. Tell him about the purpose of your visit (Mission). He will read Anna Voralberg's last will and will to you. So you find out that Anna has a brother, Hans, who after her death becomes the owner of a toy company. It is unknown where Hans is, especially since he was considered dead for the last 64 (!) years, even his grave is in the family crypt. As they say - Houston we have a problem! In the reception area, on the notary's coat rack, take something like a telescopic key. Leave the office and go outside.Streets of Valadilein
Turn right and go two screens. Then your groom friend named Dan from New York will call you. After you have sent him off, head to the door to the right, which leads to the toy factory. Carefully examine the door, there is another cunning mechanism. Use the adjustable wrench on the top figure, then on the bottom. Then pull the lever on the right. The door is open!Oscar's legs
There is a fountain in the courtyard of the factory, five paths branch off from it, including the one you came along. Take the upper left path. There you will see a metal container. Pull the lever. A crane will appear that transports the container to the factory. Go back to the fountain.Now follow the lower left path straight into the workshop building. Once inside, turn right and go to the door that leads to the water mill control panel. Pull the chain on the right to release a mechanical hamster or rat. Then pull the lever. The poor animal will run around inside the wheel and the mill blades will start to spin. Go back to the entrance door to the workshop.
Now go left, past the iron stairs. Your cell phone will ring - it’s your mother, she wants to tell you something super interesting. Sew that off too. Then start the forklift (something like a small robot) which will carry the metal container onto the conveyor. Then enter the door in the background. This is a workshop. A legless automaton hangs from the ceiling and shakes its head. Help him down. To do this, rotate the winch. After the automaton goes down, talk to him. It turns out that his name is Oscar and he was made by Hans Voralberg himself. Oscar will ask you to make him a pair of new legs. Ask him about the Production process. He will give you a special Oscar's card for the controller. Go back to the entrance.
Climb the metal stairs to the top. Enter the room of the manager - Anna Voralberg. Go to the bookcase. Pull the second book on the right to make a music device appear. Listen to the music and take the music cylinder. You can rummage around on Anna's desk, but it's not necessary. Leave the room.
Rise even higher. The control panel is located here. Read the hotel brochure. If you are too lazy to read, click on the toggle switch number 3, and then click on the button on the left three times until a golden sample of wood appears in the window next to it. Insert Oscar's card into the empty slot and click on the button on the right. After the video, go downstairs. Return to the entrance to the workshop. Go right to the end of the conveyor belt, where there will be a pair of Oscar's new wooden legs. Take them and take them to the owner. Oscar will thank you for your help and go in search of his train.
Attic and Momo
Go back to the fountain. Take the lower right path. Walk around the house on the right until you reach the garden. Here turn left and go forward to the first open gate. Come in. Examine the small fountain, it contains the Voralberg key. Take it and return to the sliding stairs near the house. Use the key on the ladder to open it. Climb the ladder into the attic. It's dark in the attic. Go right and turn on the light bulb. Momo will appear, who is ready to reveal some great secret to you if you draw him a mammoth. He will give you paper and pencil (pencil and paper). Then it turns out that Kate can’t draw. Well, okay, we'll come up with something.Go left from Momo and examine the desk. Inside you will find a bottle of ink (ink bottle) and Anna's diary. Return to the light bulb. There is a drawing of a mammoth on the wall here. Attach the paper to the drawing and trace the contours of the mammoth with a pencil. The drawing is ready! Give the drawing to Momo. The boy will ask you go with him. Follow him into the street, past the notary's house to the closed gate leading into the forest.
Cave with mammoths
Talk to Momo and he will open the gate. Follow him into the forest. Go through the park, past the old boat, in the clearing you will find Momo. Go further to the dam. There is a mechanism that opens the dam, try to open it. Alas, Kate is not strong enough for this. Return to Momo and ask for help. He will readily agree. Helping Kate, Momo will break the handle completely. Pick up the broken lever and go to the old boat. Use the handle as a hook to lift the oar out of the water. Ugh, how dirty it is! Kate doesn't want to get her hands dirty on the paddle. Go to Momo and ask him to get the paddle for you. Momo will agree and use the paddle to open the dam. When the water goes down, go to the cave through the dry river. At the farthest end of the cave you will find a mammoth toy doll. Take it. Leave the cave and continue through the forest back to the hotel.Church and crypt of the Voralbergs
From the hotel, go right to the church with the cemetery. Go around the church on the right until you reach a door that can be opened. Come in. This is the priest's room. There is a crucifix hanging on one of the walls. Move it and take the key from the hiding place. Go to the chest of drawers and use the key on the keyhole on the top right. In shelves 1, 2, 4, and 5 you will find 4 cards with holes (punch cards) of different colors. When you open the 3rd shelf, click on the handle on the right of the chest of drawers. A secret compartment will open. There you will find the Voralberg key and a letter from the priest, from which you will learn that Hans is indeed still alive. Go outside and go to the elevator entrance.Near the elevator there is a control panel where you must place all 4 gears from the hotel. After that, take the elevator upstairs. Here is the automaton that controls the organ. You can insert found cards into the empty slot on his back. For those who are too lazy to experiment, the correct card is purple (purple punch card). After the video, go downstairs.
Go to the Voralberg crypt. Use the key on the Automaton's hat above the crypt. Enter the crypt. Play Lara Croft Tomb Raider and pull out Hans Voralberg's coffin. As we expected, Hans is not in the coffin, but there is Valadilene voice cylinder and a note from the newspaper about Hans’ death.
Anna Voralberg's office
Return back to the toy factory to Anna Voralberg's office. Use the voice cylinder on the music machine. After watching the video, take the Hans-Anna mechanical toy and the cylinder with you. Go back to the fountain.Railway station and train
Take the upper right path to the train station. Enter the train and talk to Oscar. He will ask you for a ticket. Get off the train and go to the ticket office. Talk to Oscar and he will give you a train ticket and also a train release permit. Leave the station and go to the notary's house.Stamp for travel permit
At the notary's house, examine the desk in the reception area. Open the lid on the head of the seal on the table. Pour ink into it. Then place the travel permit on the table and press the red button. Take the travel permit along with the stamp to Oscar.Train departure
Climb onto the train, but do not go inside, but go to the adjacent side of the platform. Go to the beginning of the train until you see a certain mechanism that starts the train. Rotate the wheel to extend the mechanical key on the cable, and then pull the lever. You started the train!Go back inside the train. Go to the passenger quarters. Examine the shelves on the left. Place the two musical cylinders you brought with you on them. Place Hans and Anna's mechanical toy on a pedestal in the middle of the room. A toy mammoth on a stand on the table on the right.
Return to Oscar and give him the train ticket. You can wave to Valadilein - we're leaving!
Barrockstadt
The train started up, and we found ourselves in Barrockstadt, a provincial student town.After making sure that Oscar will not help you, get off the train to the left side. Go left to the stairs, without crossing the bridge, go forward until you meet the station master, who is admiring the bay. Near him on the sand lies a hook. Talk to the station manager. Go back to the train. Continue past it until Kate finds the train winding mechanism. There's just one catch: the mechanism is too far away, and the train can't be pulled there. Return to the train. There you will be met by Oscar, who will inform you that the rectors of the local university want to see you. Go left to the stairs, then right along the bridge. At the station, turn right and down the steps until you see a barge.
Barge captain
Talk to the barge captain and his wife. They will agree to take your train to the winding mechanism if you pay them 100 bucks. Kate, like a true American, has no cash, only a useless credit card. You'll have to look for income on the side. Walk back to the station and exit through the open doors. Go up the stairs to the university. Come inside.Library
At the university, walk forward a little, and then turn left and go to the first door. Come in - this is the library. Turn right and look for a ladder. Climb up it. At the top, pick up the Mushroom Guide book. She's on the right. Get down and go downstairs where the readers are sitting. On the lower right table there is a book "Amerzone book", take it. Leave the library.Grapes and birds
Go left to the next door. This is the rectors' office. Talk to the rectors. Ask them about Sauvignon and about rewards for certain services. Leave the office and go to the other end of the university until you meet Professor Pons, who is carefully examining the skeleton of a mammoth. Ask him about Hans and Savignon. Leave the university. Get back on the train.On the train, take the mammoth figurine from the pedestal. Get off the train. Go to the station master and ask him about Savignon. The old smuggler will run away from you. Go back to the stairs and right across the bridge. On the bridge you will find the station master. Try him again about Savignon and the station manager will transfer all the arrows to Professor Pons. Go to the university.
At the university, give the mammoth figurine to Professor Pons. He will open his laboratory to you. In the laboratory, in the cabinet at the entrance, take the Barrockstadt voice cylinder. Go forward and take the test tube holder and some mysterious powder (Yangala-Cola powder) on the right side of the table. Approach the professor and ask him about Savignon.
Return to the station chief and tell him that you know everything about the smuggling of Savignon (wine, as I understand it). The station commander will open the door to the garden where the grapes for Savignon grow.
Go left across the bridge over the train tracks. Enter the garden. Follow the path to the end until you see an open gate. Enter and follow the path straight ahead until you reach the Savignon grapes. Take some Sauvignon grapes. Go back to the bridge, but now don't go up the bridge. Turn right and go to the flock of birds that guard the stairs to the top. Give them grapes. While the birds are gnawing on the berries, go up the stairs. Use the flask holder on the Cuckoo's egg in the nest. Go down.
100 dollars
Go back to the bridge where the station manager is standing. To appease you, he will give Kate a bottle of smuggled wine. Go to the university, where there is a broken mechanism with violinists. Find the entrance to the mechanism. Examine the door and use the cuckoo egg on the empty scale. When the scales are balanced, turn the wheel to the middle. Come inside. Go down the stairs. Start the mechanism using the lever. Get out of the mechanism. Go to the rectors for a reward and receive a bag of money.Gateway management
Take the money to the barge captain. He will give you the lock key. Return to the station building. Go left to the control panel that controls the airlocks. Use the key to open the panel. You need to enter a code to open the gates. To do this, you can call the phone number indicated on the sign on the right, and then find the desired one by selecting combinations (combination pattern: #two numbers*). Those who are too lazy can enter the following combinations: #42* (open the lock), return to the barge captain to inform him about it, and then #41* to close it. The barge will sail towards your train. Walk back towards the train until you see a barge.Ask the captain for help (Help). He will throw you a metal chain. Attach the hook that you carry with you to the chain. The barge will pull your train along with it. Run after them. Then Professor Pons will call you and invite you to a lecture on mammoths. Go to university. Come in. Go forward to the mammoth skeleton, and then up the stairs to the auditorium. Listen to the lecture. It is quite long, you will have time to have a snack. After the lecture, go to Professor Pons's laboratory and pick up the mammoth figurine and photocopies of the lecture (paleontology notes) from the professor's desk. Get back on the train. Without entering the train, go to the other side to the winding mechanism. Repeat the same as in Valadilein. Go inside the train. Use Barrockstadt's voice cylinder on Hans and Anna's mechanical toy. Then put the mammoth figurine in place.
Visa for travel and Barrockstadt
Talk to Oscar. Hurray, we are leaving Barrockstadt! True, the train stops immediately after departure. What nonsense?Get off the train. Ask Oscar about the mission. He will ask you for a visa. Scoundrel! Go around the ticket booth on the left. Enter the door leading to the tower. Go up. Talk to the captain. Explore the telescope. Press the top red button until you see a clear image. Go to the table and look at the glasses and wine glasses. Sacrifice your bottle of wine, as well as the powder from your inventory. Have a drink with the captain for the Brudershaft. The captain decides to look through the telescope again and realizes that he is very wrong. After that, he will give you an exit visa. Return to Oscar and give him a visa. The bastard will give you a train ticket. Go inside the train and give the ticket to Oscar.
Now we are definitely leaving Barrockstadt!
Komkolzgrad (Kolkhozgrad)
It looks like we are in our native Russia... Definitely these two powerful figures of automatons with hammers and sickles remind us of something.Starting the train
When you get off the train, go straight to the giant worker figure. Climb up the stairs. Examine the shelf above the bed. Take from it the Komkolzgrad voice cylinder, Hans' designs and the handle. Look at the automaton control panel. Use the handle. Move the handle up twice until the giant is above the train. Now press the red button. A cable will come out of the giant's leg and start the train. Return to the stairs the same way. Go down and go to the train.Oscar's hands
Near the train you will see a stranger who will hide in the factory building. Get on the train. Go to the bedroom where poor Oscar is sitting, whose hands were stolen. Untie Oscar and talk to him. Then pick up the metal sheers from the floor. Listen to the Kolhograd voice cylinder. Get off the train.Return back to the giant. Pull the handle forward once. Take the stairs to the ledge of the second floor of the plant. Use pliers to widen the hole in the wall and climb inside. In the room, go forward and examine the shelves on the left. Take the spark plug. Return to the giant. Pull the handle back once. Get down to the ground.
Walk past the train to the left end of the station. Pull the lever to call the elevator. Go underground. Examine the generator on the left. Use the spark plug to start the generator. Click on the lever on top of the machine to turn on the light. Enter the mine. At the other end of the adit, enter the elevator and go up.
Go right and up the stairs to the organ. Examine the pianist who sits at the organ. Take the screwdriver lying on the organ. Walk back past the elevator and turn the corner. Examine the metal plate that is blocking the path up the stairs. Use a screwdriver to remove the 4 screws that secure the plate. Go up the stairs. Enter Director Borodin's office. Talk to him about Oscar's missing hands. Go back down the stairs.
Elena's room
Enter Elena's room. Examine the open drawer in the dresser. Take newspaper clippings (press cuts) and letters to Helena (letters to Helena). Call your mom. After that, go to Borodin. Tell him that you know where Elena is. Exit the office and take the monorail on the right.Cosmodrome
At the spaceport, go right. Go straight until you see a rocket with an open hatch. Go up the stairs. Come inside. The drunk, failed cosmonaut Charov is sitting there. Walk past the astronaut and pick up the vodka bottle from the floor. After the astronaut decides to freshen up, examine the shelf above the table. Take the key and the Space Project cancellation letter. Go outside.Go down the steps. There will be a wheel in the wall on the right, turn it. Go back up the stairs. Approach the control panel. Use the key. Then, first move the left arrow lever, and then the up arrow lever. Now the lever is in the middle to turn on the water. The astronaut will receive a cold shower and wake up. Walk past him to the cosmodrome. At the launch pad, turn right and walk towards the aircraft. Make sure the door to the machine is closed. Go back to the launch pad. Now go left to the metal stairs. Climb up to the command post using launches. Examine the console on the right. Take the Voralberg key lying there and use it on the console. Open the rectangular panel under the On/Off switch and connect the two wires. Turn on the power with the switch. On the right, take out the blood testing apparatus. Return to the astronaut.
Talk to him about the aircraft and get the airship key from him. Go to the device and open the door. Enter and pull the lever inside. Damn, the device doesn't work!
Launch of a drunken astronaut
Go to the checkpoint where the astronaut is waiting for you. Take a blood test from him. Go up to the command post. Place the blood test machine in the empty slot. Then press the far left button, then the second one from the left. Click on the hole on the blood test machine to add a little bit of your blood. Click on the second button from the left again, and then on the third and finally on the fourth.Airship in Aralbad
After you have launched the astronaut to distant stars, exit the command post. Go left until you see a control handle lying on the ground. Go down and to the left past the rocket where the astronaut was drinking. Go around the back of the rocket and go up the stairs. Use the crank on the siren where the bird is sitting.After the bird frees the aircraft, you can fly on it. This is what you do.
Aralbad
Aralbad is an abandoned resort on the Aral Sea, where Madame Romanskaya patches up her health.Hotel
Exit the airship and enter the hotel. Walk past the manager, who is watching football and using indecent language, to the door that leads to the closet. Examine the shelves in the closet and take the green bottle of detergent. Leave the closet and go to the curtains on the window, not far from the manager's desk. Open the curtains. Go outside.Use the bottle of detergent on the fountain. When the fountain is covered with bubbles, return to the manager. Ring the bell on his desk to pull him away from the football. Talk to the manager. After the manager sees what happened to his favorite fountain, he can get down to business.
Hotel access codes
Go to the manager's desk and carefully study the guest book. Remember the number opposite the name of Elena Romanskaya (1270). Take also a dirty brochure about hotels in Europe (hotel brochure), on it the telephone number of a hotel in Marseille will be written in felt-tip pen. Click on the red button on the table, it will open the entrance to the hotel.Go right through the gate to the pool. There, turn left and go two screens to the door in front of which there is a control panel. Enter code 1270 and press the lever. Continue around the pool two more screens. Enter the open locker room doors. There will be a temporary access card (temporary code) on the floor. Leave the locker room.
Go left and up the corridor to a table with dishes. Take a glass of wine (crystal dish) from the table. Return to the control panel by the door.
Dial the code from the temporary access card (0968). Come in. Wear a respirator hanging on a hanger. Enter the pier.
Pier
Walk along the pier to the gazebo at the very end. Talk to Elena. Exit the gazebo and examine the bell that is to the left of the railing. Take James' bell. Walk back along the pier until you see an empty bell pole. Hang James' bell on the pole and pull the chain. Go back to the hotel. Take off the respirator and hang it on the hanger. Go to the drinks bar, where automaton James is standing. Talk to James. James will bring Elena from the pier. Talk to her about Hans.Cocktail
Now you need to prepare a cocktail for Elena. There are two ways to do this. First, explore the bar and take the instruction manual from above. In the bottom drawer of the bar, take the lemon and crystallized honey. Now is the time to remember the phone number written in the hotel prospectus. We call it and find out the order of the ingredients in the cocktail. Leave the bar.Read the instructions for use and start mixing the ingredients.
The second path is the path for the lazy. In the bottom drawer of the bar, take the lemon and crystallized honey. Leave the bar.
Walk around the pool until you reach the jacuzzi. Use the wheel to start the hot tub. Place the jar of honey in hot water to melt it (liquid honey). Go back to the bar. Explore the empty slots in the bar. Place the lemon in the top left slot, the honey in the top right, and the bottle of vodka next to the honey.
Press the I/O button and then the second key on the piano. Move the handle on the right to the second position and press key number three. Now press the flower button (honey), then the lemon button, and finally the snowflake button (ice cube). Then press the bartender button to mix the ingredients.
After the cocktail appears on the counter, place the glass from your inventory to the right of Elena. When Madame Romanskaya finishes practicing her vocals, talk to her. Return to the airship.
Return to Kolkhozgrad
After Elena Romanskaya has become Borodin's prisoner, go to the cage. Explore the castle in Helen's Dungeon. Use the pliers from inventory to cut through the lock. Examine the pianist. Use a screwdriver to unscrew Oscar's hands. Go downstairs.Go forward to the elevator and go down into the mine. In the adit, go to the elevator to the surface. Pull the lever to lower the elevator. Yeah, instead of an elevator we got a time bomb. It's time to do your feet!
After the bomb explodes, burying the elevator beneath it, there is nothing left to do but get out through the ventilation pipe.
On the platform, go left to the explosive boxes. Take dynamite with a clock mechanism (dynamite). Go inside the train and talk to Oscar. Go to the platform.
Go to the giant and attach dynamite to his leg. Run back to the train and get out of here as quickly as possible.
We are FREE!
Return to Aralbad
Get off the train. Use the train winding mechanism. Talk to Oscar.Felix Smetana will appear on the platform and inform you about the package for you. Follow Felix to the hotel. On Felix's desk, examine the package. Take the mammoth automaton from it. Go to the bar and talk to Elena.
Go out to the pier, where an unexpected guest is waiting for you. Talk to him. To your surprise, your meeting with him will not be the end, but only the beginning of the adventure.
See you in Siberia!
This walkthrough was written in July 2002 in 30 degree heat, so if you notice any errors or typos, please write to me at: [email protected]. I'll be glad.
Hotel
Valadilein
On the street, turn left and walk two screens, past the bakery. The bakery is of no use, since all the shops are closed due to mourning. Get to the notary's house, in front of him there is a bench on which lies the latest issue of the local newspaper.
Notary's house
Go up the stairs to the front door. Next to the door there is an automaton built into the wall. Pull the lever located in the middle of the robot's chest to connect the head and body. Then place Mr. Marson's welcome letter in your outstretched hand. The notary, Mr. Alfolter, will let you into the house. Go to his office and sit in the chair. Tell him about the purpose of your visit (Mission). He will read Anna Voralberg's last will and will to you. So you find out that Anna has a brother, Hans, who after her death becomes the owner of a toy company. It is unknown where Hans is, especially since he was considered dead for the last 64 (!) years, even his grave is in the family crypt. As they say - Houston we have a problem! In the reception area, on the notary's coat rack, take something like a telescopic key. Leave the office and go outside.
Streets of Valadilein
Turn right and go two screens. Then your groom friend named Dan from New York will call you. After you have sent him off, head to the door to the right, which leads to the toy factory. Carefully examine the door, there is another cunning mechanism. Use the adjustable wrench on the top figure, then on the bottom. Then pull the lever on the right. The door is open!
Oscar's legs
Attic and Momo
Go back to the fountain. Take the lower right path. Walk around the house on the right until you reach the garden. Here turn left and go forward to the first open gate. Come in. Examine the small fountain, it contains the Voralberg key. Take it and return to the sliding stairs near the house. Use the key on the ladder to open it. Climb the ladder into the attic. It's dark in the attic. Go right and turn on the light bulb. Momo will appear, who is ready to reveal some great secret to you if you draw him a mammoth. He will give you paper and pencil (pencil and paper). Then it turns out that Kate can’t draw. Well, okay, we'll come up with something.
Go left from Momo and examine the desk. Inside you will find a bottle of ink (ink bottle) and Anna's diary. Return to the light bulb. There is a drawing of a mammoth on the wall here. Attach the paper to the drawing and trace the contours of the mammoth with a pencil. The drawing is ready! Give the drawing to Momo. The boy will ask you go with him. Follow him into the street, past the notary's house to the closed gate leading into the forest.
Cave with mammoths
Talk to Momo and he will open the gate. Follow him into the forest. Go through the park, past the old boat, in the clearing you will find Momo. Go further to the dam. There is a mechanism that opens the dam, try to open it. Alas, Kate is not strong enough for this. Return to Momo and ask for help. He will readily agree. Helping Kate, Momo will break the handle completely. Pick up the broken lever and go to the old boat. Use the handle as a hook to lift the oar out of the water. Ugh, how dirty it is! Kate doesn't want to get her hands dirty on the paddle. Go to Momo and ask him to get the paddle for you. Momo will agree and use the paddle to open the dam. When the water goes down, go to the cave through the dry river. At the farthest end of the cave you will find a mammoth toy doll. Take it. Leave the cave and continue through the forest back to the hotel.
Church and crypt of the Voralbergs
From the hotel, go right to the church with the cemetery. Go around the church on the right until you reach a door that can be opened. Come in. This is the priest's room. There is a crucifix hanging on one of the walls. Move it and take the key from the hiding place. Go to the chest of drawers and use the key on the keyhole on the top right. In shelves 1, 2, 4, and 5 you will find 4 cards with holes (punch cards) of different colors. When you open the 3rd shelf, click on the handle on the right of the chest of drawers. A secret compartment will open. There you will find the Voralberg key and a letter from the priest, from which you will learn that Hans is indeed still alive. Go outside and go to the elevator entrance.
Near the elevator there is a control panel where you must place all 4 gears from the hotel. After that, take the elevator upstairs. Here is the automaton that controls the organ. You can insert found cards into the empty slot on his back. For those who are too lazy to experiment, the correct card is purple (purple punch card). After the video, go downstairs.
Go to the Voralberg crypt. Use the key on the Automaton's hat above the crypt. Enter the crypt. Play Lara Croft Tomb Raider and pull out Hans Voralberg's coffin. As we expected, Hans is not in the coffin, but there is Valadilene voice cylinder and a note from the newspaper about Hans’ death.
Anna Voralberg's office
Return back to the toy factory to Anna Voralberg's office. Use the voice cylinder on the music machine. After watching the video, take the Hans-Anna mechanical toy and the cylinder with you. Go back to the fountain.
Railway station and train
Take the upper right path to the train station. Enter the train and talk to Oscar. He will ask you for a ticket. Get off the train and go to the ticket office. Talk to Oscar and he will give you a train ticket and also a train release permit. Leave the station and go to the notary's house.
Stamp for travel permit
At the notary's house, examine the desk in the reception area. Open the lid on the head of the seal on the table. Pour ink into it. Then place the travel permit on the table and press the red button. Take the travel permit along with the stamp to Oscar.
Train departure
Climb onto the train, but do not go inside, but go to the adjacent side of the platform. Go to the beginning of the train until you see a certain mechanism that starts the train. Rotate the wheel to extend the mechanical key on the cable, and then pull the lever. You started the train!
Go back inside the train. Go to the passenger quarters. Examine the shelves on the left. Place the two musical cylinders you brought with you on them. Place Hans and Anna's mechanical toy on a pedestal in the middle of the room. A toy mammoth on a stand on the table on the right.
Return to Oscar and give him the train ticket. You can wave to Valadilein - we're leaving!
Barrockstadt
The train started up, and we found ourselves in Barrockstadt, a provincial student town.
After making sure that Oscar will not help you, get off the train to the left side. Go left to the stairs, without crossing the bridge, go forward until you meet the station master, who is admiring the bay. Near him on the sand lies a hook. Talk to the station manager. Go back to the train. Continue past it until Kate finds the train winding mechanism. There's just one catch: the mechanism is too far away, and the train can't be pulled there. Return to the train. There you will be met by Oscar, who will inform you that the rectors of the local university want to see you. Go left to the stairs, then right along the bridge. At the station, turn right and down the steps until you see a barge.
Barge captain
Talk to the barge captain and his wife. They will agree to take your train to the winding mechanism if you pay them 100 bucks. Kate, like a true American, has no cash, only a useless credit card. You'll have to look for income on the side. Walk back to the station and exit through the open doors. Go up the stairs to the university. Come inside.
Library
At the university, walk forward a little, and then turn left and go to the first door. Come in - this is the library. Turn right and look for a ladder. Climb up it. At the top, pick up the Mushroom Guide book. She's on the right. Get down and go downstairs where the readers are sitting. On the lower right table there is a book "Amerzone book", take it. Leave the library.
Grapes and birds
Go left to the next door. This is the rectors' office. Talk to the rectors. Ask them about Sauvignon and about rewards for certain services. Leave the office and go to the other end of the university until you meet Professor Pons, who is carefully examining the skeleton of a mammoth. Ask him about Hans and Savignon. Leave the university. Get back on the train.
On the train, take the mammoth figurine from the pedestal. Get off the train. Go to the station master and ask him about Savignon. The old smuggler will run away from you. Go back to the stairs and right across the bridge. On the bridge you will find the station master. Try him again about Savignon and the station manager will transfer all the arrows to Professor Pons. Go to the university.
At the university, give the mammoth figurine to Professor Pons. He will open his laboratory to you. In the laboratory, in the cabinet at the entrance, take the Barrockstadt voice cylinder. Go forward and take the test tube holder and some mysterious powder (Yangala-Cola powder) on the right side of the table. Approach the professor and ask him about Savignon. Talk about Savignon with the rectors.
Return to the station chief and tell him that you know everything about the smuggling of Savignon (wine, as I understand it). The station commander will open the door to the garden where the grapes for Savignon grow.
Go left across the bridge over the train tracks. Enter the garden. Follow the path to the end until you see an open gate. Enter and follow the path straight ahead until you reach the Savignon grapes. Take some Sauvignon grapes. Go back to the bridge, but now don't go up the bridge. Turn right and go to the flock of birds that guard the stairs to the top. Give them grapes. While the birds are gnawing on the berries, go up the stairs. Use the flask holder on the Cuckoo's egg in the nest. Go down.
100 dollars
Go back to the bridge where the station manager is standing. To appease you, he will give Kate a bottle of smuggled wine. Go to the university, where there is a broken mechanism with violinists. Find the entrance to the mechanism. Examine the door and use the cuckoo egg on the empty scale. When the scales are balanced, turn the wheel to the middle. Come inside. Go down the stairs. Start the mechanism using the lever. Get out of the mechanism. Go to the rectors for a reward and receive a bag of money.
Gateway management
Take the money to the barge captain. He will give you the lock key. Return to the station building. Go left to the control panel that controls the airlocks. Use the key to open the panel. You need to enter a code to open the gates. To do this, you can call the phone number indicated on the sign on the right, and then find the desired one by selecting combinations (combination pattern: #two numbers*). Those who are too lazy can enter the following combinations: #42* (open the lock), return to the barge captain to inform him about it, and then #41* to close it. The barge will sail towards your train. Walk back towards the train until you see a barge.
Ask the captain for help (Help). He will throw you a metal chain. Attach the hook that you carry with you to the chain. The barge will pull your train along with it. Run after them. Then Professor Pons will call you and invite you to a lecture on mammoths. Go to university. Come in. Go forward to the mammoth skeleton, and then up the stairs to the auditorium. Listen to the lecture. It is quite long, you will have time to have a snack. After the lecture, go to Professor Pons's laboratory and pick up the mammoth figurine and photocopies of the lecture (paleontology notes) from the professor's desk. Get back on the train. Without entering the train, go to the other side to the winding mechanism. Repeat the same as in Valadilein. Go inside the train. Use Barrockstadt's voice cylinder on Hans and Anna's mechanical toy. Then put the mammoth figurine in place.
Visa for travel and Barrockstadt
Talk to Oscar. Hurray, we are leaving Barrockstadt! True, the train stops immediately after departure. What nonsense?
Get off the train. Ask Oscar about the mission. He will ask you for a visa. Scoundrel! Go around the ticket booth on the left. Enter the door leading to the tower. Go up. Talk to the captain. Explore the telescope. Press the top red button until you see a clear image. Go to the table and look at the glasses and wine glasses. Sacrifice your bottle of wine, as well as the powder from your inventory. Have a drink with the captain for the Brudershaft. The captain decides to look through the telescope again and realizes that he was very wrong. After that, he will give you an exit visa. Return to Oscar and give him a visa. The scoundrel will give you a train ticket. Go inside the train and give the ticket to Oscar.
Now we are definitely leaving Barrockstadt!
Komkolzgrad (Kolkhozgrad)
It looks like we are in our native Russia... Definitely these two powerful figures of automatons with hammers and sickles remind us of something.
Starting the train
When you get off the train, go straight to the giant worker figure. Climb up the stairs. Examine the shelf above the bed. Take from it the Komkolzgrad voice cylinder, Hans' designs and the handle. Look at the automaton control panel. Use the handle. Move the handle up twice until the giant is above the train. Now press the red button. A cable will come out of the giant's leg and start the train. Return to the stairs the same way. Go down and go to the train.
Oscar's hands
Near the train you will see a stranger who will hide in the factory building. Get on the train. Go to the bedroom where poor Oscar is sitting, whose hands were stolen. Untie Oscar and talk to him. Then pick up the metal sheers from the floor. Listen to the Kolhograd voice cylinder. Get off the train.
Return back to the giant. Pull the handle forward once. Take the stairs to the ledge of the second floor of the plant. Use pliers to widen the hole in the wall and climb inside. In the room, go forward and examine the shelves on the left. Take the spark plug. Return to the giant. Pull the handle back once. Get down to the ground.
Walk past the train to the left end of the station. Pull the lever to call the elevator. Go underground. Examine the generator on the left. Use the spark plug to start the generator. Click on the lever on top of the machine to turn on the light. Enter the mine. At the other end of the adit, enter the elevator and go up.
Go right and up the stairs to the organ. Examine the pianist who sits at the organ. Take the screwdriver lying on the organ. Walk back past the elevator and turn the corner. Examine the metal plate that is blocking the path up the stairs. Use a screwdriver to remove the 4 screws that secure the plate. Go up the stairs. Enter Director Borodin's office. Talk to him about Oscar's missing hands. Go back down the stairs.
Elena's room
Enter Elena's room. Examine the open drawer in the dresser. Take newspaper clippings (press cuts) and letters to Helena (letters to Helena). Call your mom. After that, go to Borodin. Tell him that you know where Elena is. Exit the office and take the monorail on the right.
Cosmodrome
At the spaceport, go right. Go straight until you see a rocket with an open hatch. Go up the stairs. Come inside. The drunk, failed cosmonaut Charov is sitting there. Walk past the astronaut and pick up the vodka bottle from the floor. After the astronaut decides to freshen up, examine the shelf above the table. Take the key and the Space Project cancellation letter. Go outside.
Go down the steps. There will be a wheel in the wall on the right, turn it. Go back up the stairs. Approach the control panel. Use the key. Then, first move the left arrow lever, and then the up arrow lever. Now the lever is in the middle to turn on the water. The astronaut will receive a cold shower and wake up. Walk past him to the cosmodrome. At the launch pad, turn right and walk towards the aircraft. Make sure the door to the machine is closed. Go back to the launch pad. Now go left to the metal stairs. Climb up to the command post using launches. Examine the console on the right. Take the Voralberg key lying there and use it on the console. Open the rectangular panel under the On/Off switch and connect the two wires. Turn on the power with the switch. On the right, take out the blood testing apparatus. Return to the astronaut.
Talk to him about the aircraft and get the airship key from him. Go to the device and open the door. Enter and pull the lever inside. Damn, the device doesn't work!
Launch of a drunken astronaut
Go to the checkpoint where the astronaut is waiting for you. Take a blood test from him. Go up to the command post. Place the blood test machine in the empty slot. Then press the far left button, then the second one from the left. Click on the hole on the blood test machine to add a little bit of your blood. Click on the second button from the left again, and then on the third and finally on the fourth.
Airship in Aralbad
After you have launched the astronaut to distant stars, exit the command post. Go left until you see a control handle lying on the ground. Go down and to the left past the rocket where the astronaut was drinking. Go around the back of the rocket and go up the stairs. Use the crank on the siren where the bird is sitting.
After the bird frees the aircraft, you can fly on it. This is what you do.
Aralbad
Aralbad is an abandoned resort on the Aral Sea, where Madame Romanskaya patches up her health.
Exit the airship and enter the hotel. Walk past the manager, who is watching football and using indecent language, to the door that leads to the closet. Examine the shelves in the closet and take the green bottle of detergent. Leave the closet and go to the curtains on the window, not far from the manager's desk. Open the curtains. Go outside.
Use the bottle of detergent on the fountain. When the fountain is covered with bubbles, return to the manager. Ring the bell on his desk to pull him away from the football. Talk to the manager. After the manager sees what happened to his favorite fountain, he can get down to business.
Hotel access codes
Go to the manager's desk and carefully study the guest book. Remember the number opposite the name of Elena Romanskaya (1270). Take also a dirty brochure about hotels in Europe (hotel brochure), on it the telephone number of a hotel in Marseille will be written in felt-tip pen. Click on the red button on the table, it will open the entrance to the hotel.
Go right through the gate to the pool. There, turn left and go two screens to the door in front of which there is a control panel. Enter code 1270 and press the lever. Continue around the pool two more screens. Enter the open locker room doors. There will be a temporary access card (temporary code) on the floor. Leave the locker room.
Go left and up the corridor to a table with dishes. Take a glass of wine (crystal dish) from the table. Return to the control panel by the door.
Dial the code from the temporary access card (0968). Come in. Wear a respirator hanging on a hanger. Enter the pier.
Walk along the pier to the gazebo at the very end. Talk to Elena. Exit the gazebo and examine the bell that is to the left of the railing. Take James' bell. Walk back along the pier until you see an empty bell pole. Hang James' bell on the pole and pull the chain. Go back to the hotel. Take off the respirator and hang it on the hanger. Go to the drinks bar, where automaton James is standing. Talk to James. James will bring Elena from the pier. Talk to her about Hans.
Cocktail
Now you need to prepare a cocktail for Elena. There are two ways to do this. First, explore the bar and take the instruction manual from above. In the bottom drawer of the bar, take the lemon and crystallized honey. Now is the time to remember the phone number written in the hotel prospectus. We call it and find out the order of the ingredients in the cocktail. Leave the bar.
Read the instructions for use and start mixing the ingredients.
The second path is the path for the lazy. In the bottom drawer of the bar, take the lemon and crystallized honey. Leave the bar.
Walk around the pool until you reach the jacuzzi. Use the wheel to start the hot tub. Place the jar of honey in hot water to melt it (liquid honey). Go back to the bar. Explore the empty slots in the bar. Place the lemon in the top left slot, the honey in the top right, and the bottle of vodka next to the honey.
Press the I/O button and then the second key on the piano. Move the handle on the right to the second position and press key number three. Now press the flower button (honey), the snowflake button (ice cube), and finally the lemon button. Then press the bartender button to mix the ingredients.
After the cocktail appears on the counter, place the glass from your inventory to the right of Elena. When Madame Romanskaya finishes practicing her vocals, talk to her. Return to the airship.
Return to Kolkhozgrad
After Elena Romanskaya has become Borodin's prisoner, go to the cage. Explore the castle in Helen's Dungeon. Use the pliers from inventory to cut through the lock. Examine the pianist. Use a screwdriver to unscrew Oscar's hands. Go downstairs.
Go forward to the elevator and go down into the mine. In the adit, go to the elevator to the surface. Pull the lever to lower the elevator. Yeah, instead of an elevator we got a time bomb. It's time to do your feet!
After the bomb explodes, burying the elevator beneath it, there is nothing left to do but get out through the ventilation pipe.
On the platform, go left to the explosive boxes. Take dynamite with a clock mechanism (dynamite). Go inside the train and talk to Oscar. Get back on the train. Then go to the platform.
Go to the giant and attach dynamite to his leg. Run back to the train and get out of here as quickly as possible.
We are FREE!
Return to Aralbad
Get off the train. Use the train winding mechanism. Talk to Oscar.
Felix Smetana will appear on the platform and inform you about the package for you. Follow Felix to the hotel. On Felix's desk, examine the package. Take the mammoth automaton from it. Go to the bar and talk to Elena.
Go out to the pier, where an unexpected guest is waiting for you. Talk to him. To your surprise, your meeting with him will not be the end, but only the beginning of the adventure.
Turn right and go two screens. Then your groom friend named Dan from New York will call you. After you have sent him off, head to the door to the right, which leads to the toy factory. Carefully examine the door, there is another cunning mechanism. Use the adjustable wrench on the top figure, then on the bottom. Then pull the lever on the right. The door is open!
Oscar's legs
There is a fountain in the courtyard of the factory, five paths branch off from it, including the one you came along. Take the upper left path. There you will see a metal container. Pull the lever. A crane will appear that transports the container to the factory. Go back to the fountain.
Now follow the lower left path straight into the workshop building. Once inside, turn right and go to the door that leads to the water mill control panel. Pull the chain on the right to release a mechanical hamster or rat. Then pull the lever. The poor animal will run around inside the wheel and the mill blades will start to spin. Go back to the entrance door to the workshop.
Now go left, past the iron stairs. Your cell phone will ring - it’s your mother, she wants to tell you something super interesting. Sew that off too. Then start the forklift (something like a small robot) which will carry the metal container onto the conveyor. Then enter the door in the background. This is a workshop. A legless automaton hangs from the ceiling and shakes its head. Help him down. To do this, rotate the winch. After the automaton goes down, talk to him. It turns out that his name is Oscar and he was made by Hans Voralberg himself. Oscar will ask you to make him a pair of new legs. Ask him about the Production process. He will give you a special Oscar's card for the controller. Go back to the entrance.
Climb the metal stairs to the top. Enter the room of the manager - Anna Voralberg. Go to the bookcase. Pull the second book on the right to make a music device appear. Listen to the music and take the music cylinder. You can rummage around on Anna's desk, but it's not necessary. Leave the room.
Rise even higher. The control panel is located here. Read the hotel brochure. If you are too lazy to read, click on the toggle switch number 3, and then click on the button on the left three times until a golden sample of wood appears in the window next to it. Insert Oscar's card into the empty slot and click on the button on the right. After the video, go downstairs. Return to the entrance to the workshop. Go right to the end of the conveyor belt, where there will be a pair of Oscar's new wooden legs. Take them and take them to the owner. Oscar will thank you for your help and go in search of his train.
Attic and Momo
Go back to the fountain. Take the lower right path. Walk around the house on the right until you reach the garden. Here turn left and go forward to the first open gate. Come in. Examine the small fountain, it contains the Voralberg key. Take it and return to the sliding stairs near the house. Use the key on the ladder to open it. Climb the ladder into the attic. It's dark in the attic. Go right and turn on the light bulb. Momo will appear, who is ready to reveal some great secret to you if you draw him a mammoth. He will give you paper and pencil (pencil and paper). Then it turns out that Kate can’t draw. Well, okay, we'll come up with something.
Go left from Momo and examine the desk. Inside you will find an ink bottle and Anna’s diary. Return to the light bulb. There is a drawing of a mammoth on the wall here. Attach the paper to the drawing and trace the contours of the mammoth with a pencil. The drawing is ready! Give the drawing to Momo. The boy will ask you to go with him. Follow him into the street, past the notary's house to the closed gate leading into the forest.
Cave with mammoths
Talk to Momo and he will open the gate. Follow him into the forest. Go through the park, past the old boat, in the clearing you will find Momo. Go further to the dam. There is a mechanism that opens the dam, try to open it. Alas, Kate is not strong enough for this. Return to Momo and ask for help. He will readily agree. Helping Kate, Momo will break the handle completely. Pick up the broken lever and go to the old boat. Use the handle as a hook to lift the oar out of the water. Ugh, how dirty it is! Kate doesn't want to get her hands dirty on the paddle. Go to Momo and ask him to get the paddle for you. Momo will agree and use the paddle to open the dam. When the water goes down, go to the cave through the dry river. At the farthest end of the cave you will find a mammoth toy doll. Take it. Leave the cave and continue through the forest back to the hotel.
Church and crypt of the Voralbergs
From the hotel, go right to the church with the cemetery. Go around the church on the right until you reach a door that can be opened. Come in. This is the priest's room. There is a crucifix hanging on one of the walls. Move it and take the key from the hiding place. Go to the chest of drawers and use the key on the keyhole on the top right. In shelves 1, 2, 4, and 5 you will find 4 cards with holes (punch cards) of different colors. When you open the 3rd shelf, click on the handle on the right of the chest of drawers. A secret compartment will open. There you will find the Voralberg key and a letter from the priest, from which you will learn that Hans is indeed still alive. Go outside and go to the elevator entrance.
Near the elevator there is a control panel where you must place all 4 gears from the hotel. After that, take the elevator upstairs. Here is the automaton that controls the organ. You can insert found cards into the empty slot on his back. For those who are too lazy to experiment, the correct card is purple (purple punch card). After the video, go downstairs.
Go to the Voralberg crypt. Use the key on the Automaton's hat above the crypt. Enter the crypt. Play Lara Croft Tomb Raider and pull out Hans Voralberg's coffin. As we expected, Hans is not in the coffin, but there is Valadilene voice cylinder and a note from the newspaper about Hans’ death.
Anna Voralberg's office
Return back to the toy factory to Anna Voralberg's office. Use the voice cylinder on the music machine. After watching the video, take the Hans-Anna mechanical toy and the cylinder with you. Go back to the fountain.
Railway station and train
Take the upper right path to the train station. Enter the train and talk to Oscar. He will ask you for a ticket. Get off the train and go to the ticket office. Talk to Oscar and he will give you a train ticket and also a train release permit. Leave the station and go to the notary's house.
Stamp for travel permit
At the notary's house, examine the desk in the reception area. Open the lid on the head of the seal on the table. Pour ink into it. Then place the travel permit on the table and press the red button. Take the travel permit along with the stamp to Oscar.
) begins with the Yukol tribe finding the half-frozen main character and taking her to a nearby hospital. At the same time, during the cutscene, an unknown person calls the head of the hospital and gives the order to detain Kate (the main character) by all possible methods for as long as possible. And when she wakes up, the girl sees that next to her lies Kurk, a member of the Yukol tribe, who was also left for treatment. Talk to him. As soon as control passes into your hands, go in search of a doctor and report that Kate is completely healthy and therefore wants to leave the hospital, but it turns out that the doors to the hall from the ward are locked, so they need to be opened. How to open the doors in the ward? Step by step steps are listed below.
First of all, inspect the red button on the right side of the doors. . Look carefully at the table and take the knife on it. . Now, using the knife you found, unscrew the screw on the red button (use the knife on the bolt on the top right). . When you unscrew the box, attach the green wire back to its place (it dangles). . After that, close the box and press the button again.
Now you can leave the chamber, so go out into the hall and pay special attention: firstly, to the cage with mechanical birds; secondly, two chess players who are playing in the winter garden (you can still talk with them). After this, you can safely go to the doctor’s office. He, in turn, will conduct a conversation and a humiliating interrogation procedure, after which Kate will receive the key to the exit in the form of a squid and the opportunity to pick up things. The key will need to be used on the lock of the lattice doors that lead to the elevator. Now pay attention, because you need to rotate all the tentacles so that they coincide with the holes.
“How to open the elevator doors? Solving the puzzle."
Despite the fact that the location of the key is correct, the doors will not open, so go back to the doctor, but before that, carefully examine the key in your inventory. If you are careful, you will notice that the key is missing one part. What to do next? While the doctor is wandering along the corridor, go to his office and open the drawer in the desk.

“The first thing we need to do is examine the key, otherwise Kate will refuse to examine the doctor's office. And when examining the key, you need to point a circle at the hole in the key - this is where the key part is missing.”
So, when you start examining the drawer in the doctor’s desk, your goal will be a brochure about the hospital, which has a red cover. And it will lie at the very bottom of the box. When you find it, open it and flip through the pages until you come across an image of a key with tentacles. Next, apply the key from the inventory to the picture in the brochure, after which Kate comes to the conclusion that the hairpin is missing.
It's time to go back to your room and talk about everything with Kurk, plus show him the brochure you found. From him you will learn that a blacksmith from his tribe can easily make such a part. However, the fact is that the brochure can only be transmitted through a messenger owl, with the help of which Kurk sends messages to his tribe. So you'll have to use this owl.
Therefore, go out onto the balcony and call the owl sitting on the spire, although this will not give anything. Now return back to Kurk and talk about how the owl does not respond to commands at all. He, in turn, will tell you that the owl is quite old, so you need to find a way to call it to you.
To find bait for the old owl, you will need to get into the barrier with mechanical birds, but first this barrier will need to be opened. Therefore, go out into the hall and return back to the chess players in the winter garden, where one chess player will already be sitting, although to be more precise, he will be sleeping.

“How to open a cage with mechanical birds? The first thing you will need to do is find the key, which is in the pocket of a sleeping patient named Anton. Don't be afraid, he won't wake up. Take the key and leave."
Having opened the cage with mechanical birds (with a new key), take the parrot and return back to the chamber. Go to the balcony. Then everything is simple: go to the active zone, take out the mechanical parrot from your inventory, place it on the windowsill, turn the key behind it and a cutscene begins, during which Kate will hand over the brochure to the owl, which in turn will fly away. The job is done, so return back to the ward.
In the ward, the main character will see that Kurk was hypnotized and then, using modern technology, he was injected with an unknown medicine (if it is even a medicine). Next, during the cutscene, a rather difficult conversation with unpleasant consequences will follow with the manager, about whom they talked so much, Olga Efimova. However, if you do not anger Olga Efimova, but calmly leave, then the stern woman will not inject anything and the girl will not lose consciousness. Nothing will change significantly either in the first or in the second case. It’s just that in the first version the main character will wake up on the floor after some time. That's all.
However, no matter how you behave, in any case you will need to go back to the balcony and pick up a brand new key from the waiting owl. Therefore, it will now be possible to leave the department. Before leaving, you can talk to Kurt again, because he will wake up and from his condition it will be clear that he is very bad.
After descending, you will need to talk to the receptionist. From her, the main character learns that the hospital is now under a closed regime. Therefore, you will have to go to the manager/chief physician, Dr. Zamyatin. The story of what Olga Efimova is actually doing will not give anything, so Dr. Zamyatin will be quite good-natured and ask you to return back to your room.
When you talk with Zamyatin, leave his office and go to Olga Efimova's office to overhear a rather interesting conversation with an unknown colonel, in whom Kate is very interested. In addition, in addition to this, you will be able to find out that very soon an American detective named Cantin, who is searching for the girl, should arrive. But when Olga Efimova leaves her office, turn on the computer and read all the messages. Moreover, pay attention to the “image of a squid in the upper left corner of the monitor.” On top of that, completely unexpectedly, Cantin gets in touch, finds out about Kate Walker and tells him that the girl is wanted for a bunch of uncommitted crimes.
Now a new puzzle awaits you. So, first of all, go to the knight model and press the lever on the wall. After this action, the game will point to the hilt of the sword and the shield. Switch to the sword, where you will need to bend the clamps on the left side and collect another picture of a squid.

“How to solve a sword puzzle? The hilt of the sword spins and all you have to do is collect the image of the squid that is found everywhere in the hospital.”
After you unlock the secret of the sword puzzle, the stones will be revealed to your attention. Pay attention to the stones (2 blue stones, 1 green stone and 2 red stones). So on the shield there will be exactly the same stones and to set the desired colors, you just need to twist them.

“Now switch to the shield. This screenshot shows the correct sequence of stones to solve the small shield puzzle."
Once you do everything correctly and the entire puzzle (which is divided into two parts) is solved, a secret passage will open. Walk forward along the corridor, get into the elevator, press the button and go down.
Below, having walked a little forward, Kate will stumble upon Efimova and her faithful assistant, who decided to open the taps with some oil products in order to prevent the yukols from crossing the lake. When the doctors leave and control passes to you, take the canister on the left. Now go across the bridge to the other side and near the same bridge you will find a barrel of hydrochloric acid. Fill the canister with acid and go to the boat with it to burn the metal chain that prevents you from going on the boat through the sewer to the lake. The cutscene will begin.
Part - 2: “Yukol Tribe - Lake”

How to set up a dam/dam? How to purify lake water? How to get to the city? Where can I get a stamped pass?
Kate will safely sail on her boat to the temporary camp of the Yukol tribe. Once control is returned to you, talk to the yukols and warn them that the water is contaminated, so it is not suitable for drinking, the animals could be seriously harmed. And yet, warning is only the smallest part of the job. Because now the water in the lake has to be cleaned. So, where to go now after talking with the Yukols? Go to the right along the path, which in turn goes along the lake (there is a passage to the path with an ostrich yukol and a red banner).
Follow the path until you reach the dam (or dam - whichever is more convenient for you). Near the stairs on the dam there will be a sensor that shows the level of water pressure. The only problem now is that near the sensor there is a tooltip with a poor quality image, which shows how to properly configure the operation of the cleaning dam.

“The table in question is marked in the screenshot above and I want to note that there are four waves marked on this line, two of which (1st and 4th) are prohibited by an exclamation mark in the triangle. To make it easier to understand, all the signs are marked in the screenshot above.”
On the first and fourth lines, there are exclamation marks in triangles, which imply a ban, but on the second and third, the thickness of the drawn lines (which represent water) show how much the valves need to be closed.

« How to open or close the damper? It’s quite easy to get confused with this matter, so remember: to close the valve, turn to the left; to open, turn to the right.”
Now move on to the dampers that are located near the stairs above. I'll start with the dampers that need to be closed: the first damper - close it completely (turn it all the way); fourth damper - the point is that this damper is closed by default, so you don’t have to touch it at all. The dampers that need to be opened: the third damper - you open it completely, so again turn the lever all the way, but in the other direction; second damper - with this damper everything is not so simple, because it only needs to be opened slightly, and not opened completely.
Now you can safely go back to the leader of the Yukols (who will stand out from the rest of the people with gray clothes) and tell them that the water has been purified. After a rather lengthy conversation with him, enter the tent that stands directly in front of the main character. Inside, talk to the shaman named Ayahuasca. You will need to talk to her about the Yukols’ future plans, and about Kurka, of course. After talking, it will be decided that it is necessary to help the young Yukol get out of the terrible hospital as soon as possible. However, to do this you will have to somehow go to the city and, on top of everything, get a ready-made prosthetic leg from the master.
But before you go further, I recommend that you carefully examine the yurt and collect all the useful items that will be useful during the further passage of Siberia 3. First of all, I suggest visiting the only available mini-yurt on an ostrich. There is a box in the yurt, and in the box under the junk there are candles: you remove the trash from above, take the candles and leave. Below is a screenshot of a marked box in a yurt with candles inside.

« How and where to find candles? Candles lie in the yurt. Therefore, I don’t think that in this large hut it will be difficult to find the only available yurt on an ostrich. Another thing is that in this yurt you can examine many things. So in the box you can find candles that lie at the bottom of the box under various junk.”
Now you can leave the large hut and go to the checkpoint. At the exit there will be two paths: one leads to the right, the other leads to the left. Now you need to follow the path that leads to the left. You will go to the right side towards the lake a little later.
In any case, at the end of the path (which goes on the left side) Kate Walker will come across a guard who refuses to let the girl through, even though she clearly does not look like a yukol. In general, this comrade demands a pass with a stamp. End the useless conversation with this person and enter the checkpoint (checkpoint). The entrance to the building is directly behind the girl.
First of all, inspect the table, and on the table there is a stamp machine. Now everything is simple: release the fasteners (just turn them to the side, one fastener to the left side, the second fastener to the right side), take a leather tablet (on which the official stamp has been successfully imprinted) and be sure to take the ink sponge (the sponge will lie on the same machine near the stamp).

“Be sure to inspect the seal backing (particularly the seal itself in the corner at the top). The point is that if you don't examine the item, there won't be any further interaction. Therefore, you can even walk in circles around the locations, but nothing will happen simply because you did not inspect the lining with the seal in this case. For the future, remember: you must always inspect objects.”
After you take the lining and examine it (and I want to note that it also has a squid on it), leave the house and go back to the large yurt (market), where you now turn to the right, which in turn leads towards the lake . At the end, near the lake on the shore, there will be a dead squid lying in a pool of blue goo. So, at the same place, take a sponge and dip it straight into this puddle of blue liquid (if Kate refuses to do this, then it is enough to examine the sponge in her inventory for the heroine to realize that the sponge is dry).
Now it’s time to go back to the market tent and find the local yukol blacksmith there (to create a pass), to whom you can show the trace of the stamp on the tablet. He will also ask for more wax (candles), but if you followed this walkthrough, then you should already have the candles, if not, look Syberia 3 walkthrough higher. In any case, in just a minute Kate will receive the seal of the city of Valsembor, but that’s not all. In addition, in the market, in the same large tent, you will need to find a merchant who has a hat with earflaps on his head, and he himself has a black beard. Talk to him and soon you will receive his wife's pass, only without the stamp, but you will already take care of this yourself. The main thing is that you now have all the necessary things in your hands.
Now go back to the checkpoint. A logical question arises: how to make a pass?. Place a leather pad for printing on the table. . Now select a pass without a stamp in your inventory and post it too. . Close the clamps back. . Now place a sponge that has been soaked in ink on a specially made “spoon”. . Next, install the seal. . Lower the lever on the right side of the device. . Now turn the “spoon” with the sponge onto the printing area. . At the top, now press the main lever (the largest one). . After this, move the “spoon” with the sponge back to the side (this is the left side). . And finally, press the main lever from above again. Ready.
As soon as the seal is ready, a cutscene will begin, during which Mr. Cantin will enter the house. As a result, the girl ends up with her hands tied, but soon after the conversation Cantin will leave, so the girl will have time to escape. First of all, grab the shelf with the bottle, although after falling the bottle will not break. Next, grab the lamp on the table: push it so that it falls, then sit on the floor and use the glass fragments. As soon as you are free, leave the house, present your pass to the guard and Kate will calmly pass through. Soon Cantin will notice Kate leaving, but his attempt to stop the girl will end in complete failure, because the Yukols will take over the case, interfere with the agent and take away the order for the arrest of Kate Walker
Part - 3: “City of Valsembor - Watchmaker”

How to save a watchmaker? Where can I find the medicine? How to set the time correctly?
Now, thanks to you, Kate Walker finds herself in a city called Volsembor. As soon as control passes back to you after the cutscene, you will be able to hear from local residents on the embankment, or from a drunkard (Captain Obo) a little further ahead, about a lake monster and a ferry called “Crystal”. In any case, don’t linger around him for long and go straight to the tavern, near which another drunkard is already sleeping on a bench. Inside, go to the bar counter and talk to the bartender, who will turn out to be the same merchant who gave his wife’s pass to the Yukol tribe. Afterwards, be sure to talk to Sarah, the granddaughter of the watchmaker Steiner.
In any case, you will need to soon leave the tavern and turn right towards the car. Turn left from the car and follow the road forward. The path will be linear, so you will soon reach the watchmaker's shop. Enter, a cutscene will begin inside. Talk to Steiner.
During the conversation, Steiner will notice that Kate is wearing the heart of an automaton around her neck - a medallion uniquely made by Gangs Voralberg. It turns out that Hans was not only a friend for Steiner, but also a mentor. Therefore, he will suspect the main character of stealing the mechanism and no excuses will help. Because of this incident, Steiner will become very nervous and feel very bad, so he will have to find a cure as soon as possible. First, take an empty cup near the clock.

“When Steiner becomes ill, first of all take an empty mug, which will contain the actual medicine. The mug stands about a clock on the next shelf.”
Did you take the mug? So, go around the table at which Steiner is sitting and carefully examine all the shelves that will be in the table.

“There will be only nine shelves in the table: three shelves per three rows. You won't find a cure there. All that can be found among all these shelves is a recipe. The recipe is in the third row from Steiner in the second shelf.”
Since there is nothing else in this part of the house (including medicine), go down the stairs nearby. Below, in addition to the unfinished prosthesis, you can also find a note with the words: “Grandfather, don’t forget to take your medicine three hours before lunch.” However, the subtitles will tell you to take your medicine before dinner. Therefore, if you encounter the same error in the game, then know that the correct hint is three hours before dinner. Climb back to Steiner and go behind him, where a clock with an inconspicuous blue backlight will hang. Switch to the clock, then start by placing an empty mug. After that, set the dial to “17:00”.

« How to solve the clock puzzle? It's quite simple. In the screenshot above, the time has already been set correctly, so you can easily do exactly the same. Just don’t forget to put the mug down first.”
Along with the medicine, turn back to Steiner, open your inventory and use the mug on him. Moreover, you definitely need to go into your inventory and use the mug - you won’t be able to automatically give your grandfather the medicine. In general, when you talk to him, follow him down into the basement.
When you find yourself at the bottom, don’t rush to go far and immediately look into the box near the exit. Remove all the trash and take the reel of film (it's just film), which Steiner will now ask for. Now go to the watchmaker. Next, use the found reel on the projector and the film will begin, thanks to which Kate will find out exactly what role the Crystal ferry played at one time along with Captain Obo. Therefore, soon the girl comes up with the brilliant idea of transporting the Yukols by ferry. The only problem is that Captain Obo drinks terribly, but in any case, you still need to find him and this can be done in the tavern where Steiner’s granddaughter works.
Part - 4: “Town of Valsembor - Ferry “Crystal”
How to remove coal from a warehouse? How to get the key from a model ferry? How to operate a crane?
Now you need to persuade Captain Obo to transport the Yukol tribe on the Crystal ferry. Obo, in turn, sits in the tavern and you can go straight there, but you can also visit the Crystal ferry before that. It is not at all necessary to inspect the ship, but if you want to have a strong argument in a conversation with the captain or simply want Syberia 3 walkthrough was full, then it is better, of course, to inspect the ferry. If the ship does not interest you, skip this part of the walkthrough and move on to the next part of the article below.
Return back to the Crystal, go on board and go to the deck. There will be no one on deck, so go higher straight to the captain's bridge. There is a table on the upper deck, and on the table is “Captain Obo's Logbook,” so take it and be sure to go into your inventory afterwards to read the logbook: flip through the pages and read. Why read it? Thanks to this magazine, the main character learns that the captain keeps the key to the ferry in his jacket. Now you can return back to the tavern.
Captain Obo will be sitting at the last table on the left side, so go to him and try to talk to the drunkard. In general, talking to the captain will not yield anything, because he is simply insane. So now you should turn to the tavern owner and the watchmaker’s daughter Sarah for help.
The conversation with them will turn out to be quite long, but in the end Kate will receive a sobering drink. Return back to Obo and soon Sarah will bring you a “drink” at the house’s expense. Captain Obo will now be much more accommodating, so after several weighty arguments from you, he will agree to transport the Yukol tribe to the other side. So now you can go back to the Crystal. On board the ferry, climb onto the captain's bridge and Obo will give you the first task: he will order the coal to be loaded onto the ferry and for this he will provide the heroine with the code for the coal warehouse and loading crane. The code looks like this - “0509”.

"Captain Obo's code to get Kate Walker into the coal yard and operate the loading crane (0509)."
Go back out onto the deck, be sure to tear off the hatch right there (into which you will then unload the coal) and go down. The warehouse is located opposite the ferry. Near the large gate that leads to the warehouse, on the side (on the left side) there is a combination lock on which you will need to dial the code - “0509”.

“The same code panel that is located on the left side of the warehouse doors. Due to the fact that the controls are designed for consoles, it will be a little awkward to enter, but you are guided by the center of the circle, even though the circle will cover several buttons at once.”
Now Kate is in the warehouse. Go forward and you will see a trolley on the right side. Go further to the mesh fence and take the chute there. There will be a box near this gazebo (on the left side). Go to the box and take the crowbar nearby.

“Be sure to inspect the chute in your inventory so that further interaction can begin. Otherwise, Kate will never understand that the chute is connected to coal.”
How to remove coal from a warehouse? To do this, you will need to complete the following few steps. . From the box (near which you took the crowbar) go to the left. Now you will have to knock on the rectangular iron pipes (boxes) to determine where the coal is (if you don’t want to waste time going through all the iron boxes, then see the screenshot below). . After you determine where the coal is, return to the minecart and push it towards the desired box. . When the cart is in place, carefully examine the box and install the gutter (the place where you need to install the gutter will be the only one, so there will be no problems with this matter). . Installed? Now press the button on the right side of the box, after which the coal will begin to fall directly into the trolley. . Next, go back and pull the lever, which will change the position of the rails in the desired direction. . Now Kate must definitely try to move the trolley, although nothing will work. . So now get into the car, which is located behind the trolley. Using a knife, pick out the top green button on the left. . Next, you need to attach the same button to the lower right switch (below is a screenshot that will help you better understand what needs to be done). . Finally, you click on the button (which you installed). . And pull (press) the lever all the way.

“This screenshot shows the location of the desired box.”

“The topmost green button on the left side needs to be picked out with a knife. And the resulting button will then need to be installed on the lower switch on the right side.”
If you do everything correctly, then the girl will successfully remove the trolley loaded with coal. And in just a couple of minutes the coal will be loaded onto the ferry. To do this, go now to the tap and enter a fairly familiar code - “0509”. The panel with the code, in turn, is located on the side of the same tap. After the code is entered, a ladder will lower, so go up to the cabin. Now comes a rather complex puzzle, which raises a logical question: How to load coal on a ferry? Below the screenshot will list the steps you need to perform to load coal onto the ferry.

". Move the first lever in the screenshot forward until it stops. . Turn the second lever, which moves in a circle, so that the top of the tap is above the coal (turn a quarter to the left). . Press the button to open the crane's tentacles, after which the trolley will be captured (if the tentacles do not fall, then press the second button). . Next, pull the lever to the right all the way, be sure to return to the first lever and lower it down, after which you pull the lever under the number “4” again to the right. . Again, pull the lever under the number “1” all the way up and again pull the lever under the number “4” to the right. . Now all that remains is to use the lever under the number “2” to turn the cabin so that it is above the hatch and the job is done. The main thing is to carry out the steps described step by step and everything will work out.”
Return after the manipulations with the coal back to Captain Obo. The captain will be pleased with the work done, so he will provide the following task: now you will have to fill the ferry tanks with water. At the bow of the ship, near the hatch (into which you unloaded the coal), go to the pump. Now you need to connect the hose to the pipe by first turning the lever. And when the hose is connected, the lever will need to be turned again to secure the pump. Now go down to the shore.
Go to the water ladder and go up the stairs. At the top, near the huge pipe, pull the lever. When the short cutscene has passed, return back to the captain and report on the work done (Obo is on the captain's bridge).
So, in the course of the dialogue, Kate learns that Obo lost the ignition key 20 years ago and comes to the conclusion that the trip is cancelled. However, he let slip that Schneider designed the ship at one time, so perhaps he has the key. Return back to the watchmaker's shop and learn from Sarah that her grandfather went to the hospital to pick up the trigger. But all is not lost, because Sarah allows us to go to the basement and examine the model ferry, which may contain the key. So come down. A model of a ferry stands in the center of the room and a logical question arises: how to get the key from the ferry model?


« How to remove the grate from a model ferry or solve the ferry puzzle?. First of all, click on the button to turn on the backlight for the layout. . On the side of the model there is a hole for the handle that Sarah had previously given to the heroine, so insert the handle and twist it all the way until the model is completely open. . When the grate lowers, be sure to read the inscription next to the layout and remember the following numbers: 30, 80, 60. . There will be a wheel available on the ship model, so switch to it and dial the numbers in the following order: 30, 80, 60. After this, be sure to set the pointer all the way to the right side (in general, where the number 100 could be). And pay attention: you need to type numbers from end to beginning. . If you do everything correctly, then the anchor chain will become active and you can pull it. . When the layout opens, take the key."
But since Kate only got a model of a real key, it turned out to be too small, so it’s not suitable for a real ferry, and for the same reason, a new key will now have to be made. First of all, pay attention to the workbench nearby: approach it, look at the shelf below and you will find a box with blanks for keys. Take one blank and go to the machine on the table. How to make a copy of the key? See description below screenshot. The sequence of actions in the description, as usual, is numbered, so I strongly recommend following the numbering.

« How to make a copy of a ferry key?. Open the round door on the left side and insert the key from the ferry model into the center. . Now to prevent the key from slipping, clamp the inserted key in a vice using the button next to it. . Next, open the doors on the right side and now insert the key blank. . There is a bar in the center that will set 250%, but you need 200%. . Now all that remains is to press the red button and the key will soon be ready.”
Now Kate has acquired a real key to the Crystal ferry and so she can continue on her journey. You can report your success to Captain Obo. However, it will not be on the captain's bridge, so insert the key yourself and the cutscene will begin.
The problems don't end there, so Captain Obo says that now he has to talk to the mayor, otherwise he won't be able to leave the port. To find Mayor Bulyakin, go to the square where he will give his speech. You can talk to the protesting people along the way, but you go up to the mayor and talk to him. Moreover, it will not be difficult to persuade him to remove the “locks” in order to sail away from the city. The only problem is that there is no engineer who would dive into the water and remove those very “locks”. So go back to Captain Obo and tell him everything. During the conversation, it turns out that it is Kate who will plunge into the water. In addition, the captain will tell you about the monster that lives in these waters.
Part - 5: “Town of Valsembor - Lake”

How to fill air cylinders? How to open a gate underwater? Where can I find the chain from the mechanism? How to run a cable car?
It's time to go to the warehouse, where you can get the appropriate diving equipment. Captain Obo will be standing near the warehouse. Go inside to get the diving suit.

“Although Captain Obo will offer to select the appropriate equipment, you will only be able to take an orange diving suit. So move things aside and take it.”
After taking the suit, do not rush to enter the fitting room, because first you should be fully prepared for the dive. Therefore, go to the table nearby and take the diving helmet on it. Have taken? Now take the cylinders, which in turn will lie directly under the hanger from which Kate previously removed the diving suit.

“Be sure to check the cylinders in your inventory, otherwise Kate will not be able to fill them with air. The main character must see that the required pressure is 180.”
But now a logical question arises: How to fill air cylinders? It's really simple. Below is a screenshot with the correct sequence of actions.

". So, first of all, insert the cylinders into the air apparatus. . Now lower the metal flap (not the red handles, but the flap). . Now switch to the panel above and use the gray arrow to set the pressure value to 180. . As soon as you set the correct pressure, press the green button and do nothing for now, because the air slowly enters the pipes, wait until the camera changes position. . And now you can finally pull the two red taps, thanks to which you can fill the cylinders with air.”
Now take the cylinders and go to the locker room, after which the cutscene will begin. Kate now goes down into the lake to restore order there. So, once in the water, move to the right (sticking to the wall) until you find yourself near the mechanism. Kate will have to repair this mechanism. First of all, pick up all the gears and the square key - everything is right next to the mechanism, so just be careful.


“The correct arrangement of the gears is as follows. A little higher you can see the diagram that the city mayor gave Kate.”
How to find a chain from a mechanism? Let's go on a search. Continue moving to the right along the wall. At the very end there will be doors - insert a square key into these doors and turn the valve. It will be quite difficult to turn, especially with a mouse, but you still turn. When you hear a click (characteristic sound), you can pull the lever. As a result, the first gate leaves will open.

« Chain location for mechanism can be seen in the screenshot above. You need to find a boat broken in two, among the wreckage of which you can find a chain for the mechanism.”
Together with the chain, feel free to return back to the mechanism to completely repair it. Inserting the chain is not a problem, so do it yourself. Next, turn the valve to the right until a characteristic sound is heard. After that, feel free to pull the lever. The cutscene will begin.
Part - 6: “Town of Valsembor - Funicular”

How to run a cable car? How to open the station door? How to solve the wedge puzzle? Solving the puzzle.
After talking with Captain Obo, you need to go back to the Yukols and talk with Ayahuasca, because everything is ready to sail. The only problem is that Semyon Steiner never brought Kurk from the hospital, so the main character will have to go after him personally. In any case, after the conversation with the shaman, a cutscene will begin.
In general, to save Kurk you will have to go to the funicular. It, in turn, is located near the city hall, up the stairs from the square. Go there. Although all the roads in the city lead to the funicular station, so you won’t get lost.
« How to open the station doors? Problems can arise with this, and all because when inspecting the doors you only need to look at the bottom.”
Upon arrival at the desired location, go to the funicular rails and inspect them, then go inside the booth. And now you can get confused, because at the moment you just need to lower the camera down to the threshold, and then go down the stairs (which are located on the left side of the station), on the side of which there is a cart behind bars.
There will be wedges under the wheels of the cart - knock them out. After this, the cart will roll down, and you, in turn, will need to take these wedges with you. And nearby in the same place there will be a small wedge - you must also take it, otherwise you will not be able to advance further. Now it's time to head back to the station doors. Click on the door and lower the camera down again.

« How to insert wedges correctly? The point is that you need to use these planks to lift the door. . First of all, insert a small wedge into the marked place under the number “1” in the screenshot. . A little to the right, then insert the first large wedge to raise the doors even more. . After that, pay attention, take out a small wedge and insert it into the left accessible point to lift the left side of the doors. . Now insert a large wedge near the small wedge (a little to the right). . And now pull out the small wedge again, this time pushing it over the large wedge on the right.”
So, when you manage to open the doors, they will simply fall, so you can safely go inside. It will be incredibly dark inside and the only thing you will notice is the shield on the left side of the entrance. Of course, you won’t be able to open the shield with your bare hands, so take a knife and use it to open it. Having opened the shield, lower the red switch down and thus turn on the light.
Now pay attention to the control panel in front - approach it. Lower the lever down and the funicular will go down to the heroine. The cutscene will begin. Exit the booth, go inside the funicular and click on the control panel, after which the next cutscene will begin.
Part - 7: "Hospital - Rescue"

How to free Kurk? Where can I find the password for the code panel?
Returning back to the hospital, first of all get to the helicopter on the left side, which you can enter from the back side. In the helicopter, there will be a chest inside at the back, and inside this chest you can find a walkie-talkie (the item is located directly under the helmet). You can now enter the hospital. The cutscene will begin.
So, Kate will hide behind a column and at a certain moment, after a conversation between two armed people in the reception area, you can click on them. So, click on them and select the radio in your inventory, after which the main character will carry out a small and short scam - she will make a false call. The security will eventually leave, and control will pass to you.
Examine the overturned cart and go to the offices where Steiner will be found. In general, after the conversation, return to Dr. Efimova’s office, where you have already been. This time Kurk will be lying in the room.

« How to free Kurk?. To begin, take a paper clip on the side of the piece of paper below. . Next, switch to the back of the chair: open the flap, take out a paperclip and insert it into the mechanism to stop the pendulum. . Now switch to the medicine and open the bottom of the syringe to empty the contents. . And now you need to pour into the same syringe (using the equipment) the medicine that Ayahuasca gave. . Kurk will come to his senses, but now you need to remove the shackles, so to do this, switch to the locker on the side of the chair and a code panel will appear.”
Where can I find the code for the code panel on Trigger's chair? Examine Efimova’s table, on which you will find a figurine and a note. The note in the inventory will need to be read. The corner of the letter with the password for the combination lock will be torn off, so there will be nothing left but to gouge the code panel with a heavy figurine of Olga Efimova. A rather long cutscene will begin.
Part - 8: “Sea monster - The path to Nakhodsk”

How to launch ice axes? How to break a searchlight on the stern? How to remove or distract the monster? How to turn off the engine? Where can I get a lamp?
A new problem has arisen - ice. The problem is that a thick layer of ice has appeared along the way, and sailing the roundabout route is too long, so Captain Obo orders the launch of icebreakers. So you will need to turn on the icebreakers, lower them onto the ice and apply voltage.

“After talking with Obo on the captain’s bridge, Kate will go downstairs, where you, in turn, will need to pick up homemade matches, the location of which is marked in the screenshot above.”
Did you take the matches? Then go down to the engine room (this is the adjacent staircase, which is located near the staircase that leads to the captain's bridge). At the bottom, go down the stairs below and up the other stairs nearby to reach the ice ax control panel. But now the most important thing: how to turn off ice axes? Pay attention to the screenshot below and its description. But as soon as you do everything correctly, the screensaver will begin.

". First of all, turn the red valve (or handle - whichever is convenient) all the way. . After that, open the cover on the red button and press it. . Now the most difficult thing: the handbrake needs to be switched according to the numbers 1-3-2 (and after switching to “1”, you will need to pull the lever down). And don’t forget to do everything quickly, otherwise the captain will scream a lot.”
During the cutscene, problems will arise and therefore Captain Obo will send the main character to check what’s wrong. Having gone downstairs, as usual, do not rush to go further and carefully inspect all the seats, because under one of them you can find an emergency signal in a box.

“After you turn on the icebreakers, the captain will send Kate on a mission again, then pay attention to the seats below, because under one of them there is a box, inside of which you can find an emergency signal, so don’t miss it.”
In any case, go outside through the back doors. The cutscene will start soon. A sea monster will appear, whose attention was attracted by the light on the ship, so Obo will order to turn off all the lights. Of course, you won’t be able to break the spotlights with your bare hands, so as soon as control passes back to you, go to the right side and find the box. There will be a crowbar near the box. Now you need to break six spotlights: 2 - on the left, 2 - on the right, 1 - at the stern, 1 - at the bow.

“The only problem will be with the searchlight on the port side, because you won’t be able to lower it, so you’ll have to go up to it. In order to rise, you need to move the box nearby. Then everything is simple: get up, break the spotlight and move on.”

“As for the spotlight at the stern of the ship, you won’t be able to simply approach it because the monster’s tentacles will drive the heroine away, so open your inventory and use the emergency signal. This way, the girl will distract the attention of the sea monster.”
After the cutscene, Captain Obo will order you to turn off the engine, because the monster is still not far behind, so go back to the engine room. This time, go through the icebreaker control panel a couple of steps forward. Then you just need to pull the lever and return back to Obo. Upon arrival, the captain will order to find the lamp. The point is that he plans to distract the monster, but this will require a gramophone and a lamp. There is a gramophone, so all that remains is to find the lamp. Where can I find the lamp? Return once again to the engine room.

“Be sure to visit the captain’s bridge and examine the books lying on the floor, among which Kate will find a hiding place. There will be vodka inside the cache - take it.”

« Where can I find the lamp? How to light a lamp? So, in the engine room, behind the stairs that take you down to this part of the ship, there will be a table. There will be parts of the lamp on the table. You assemble the lamp, pour vodka inside and use the matches you found earlier.”
With the lamp lit, now return back to Captain Obo. The cutscene will begin. Obo will sacrifice himself to distract the sea monster and it will, of course, retreat, thereby leaving the Crystal ferry alone.
Part - 9: "Baranur Park"

How to pull the ferry ashore? How to connect power? How to remove the cable? How to turn on the automaton? How to get anti-radiation glasses? How to open the box?
So, the ferry "Crystal" lost its course, ran aground and ended up in Baranur. There are many problems now, but the main problem right now is that the ostriches cannot get out of the hold, because they will simply drown, so we need to find a way to pull the ship ashore.

“First of all, pay attention to the box on which it says “Radiation Glasses” - you will need to get them now.”
Before going down, you need to get the above-mentioned glasses. If you open the box with glasses now, the heroine will not receive anything, so in Baranur we will start with this. Return to the captain's bridge and near the helm, take out the key that you once made from the watchmaker Steiner. With the key you can return back to the box. Switch to the box, turn the camera to the left and there will be a place on the side where you can insert the key. Insert the key, turn it, open the drawer and get anti-radiation glasses. Now you can go down. If you look carefully, you will find ropes that cannot be used because there is no power. In any case, go down to the beach and move to the wide staircase on the shore, near which there will be a small cutscene.

“Be sure to climb up the stairs to this guard house to find a telescopic rod at the top.”

“You now need to use the telescopic rod to remove the rope from the pole.”
Found a telescopic rod? Did you remove the rope using it? Wonderful. Now return to the engine room. Now everything is simple, because there you need to go to the same lever with which you turned off the engine during the attack, and then pull it. In general, eventually, thanks to the Crystal ferry, power will be connected to the city.
So, you now have three important tasks: the first is to pull the ferry “Crystal” ashore, the second is to try to restore the automaton, the third is to take the yukols out of Baranur. Go back down to the shore and go to the gate of Baranur Park.
In the park, turn right and go up the stairs. Pick up the crumpled note on the ground above, and then examine it carefully in your inventory. Next, be sure to inspect the trolley nearby. Come down. Now go to the left side and enter the building through the accessible doors.

“Inside, look at the poster on the wall and remember the numbers 15 and 25. They will come in handy later.”
Near the poster presented above, examine another box with the Voralberg emblem. You won't be able to open the box yet, but you will remember where it is.

“Don't rush to go out. In this same room, in addition to everything, there is a box inside which you can find a gear. Be sure to take it."
When you have completely examined the room, exit it, but through another door (which is on the opposite side). Outside, move to the right until you come across some trolleys lying down. Carefully inspect the trailers, after which they will fall down. After that, turn to the right and move on, until this time you come across a train that at one time pulled carriages. There will be a winch at the back, thanks to which it will be possible to tow the Crystal. When Kate informs you that the train will not work without an automatic machine, be sure to take the key from the hands of the robot lying on the ground.

« How to open the box? Thanks to the found key, which, by the way, must be examined in the inventory, you can now open the box, so go back to the room.”
When you insert the key, be sure to turn it, because everything must be done manually. In the box that opens, be sure to take the Voralberg key (cruciform) and take the Voralberg wrench. All this will be useful in order to repair the automaton. Outside, Kate will be greeted by the yukols. The cutscene will begin. In any case, after the conversation, you can go back to the automaton sitting on the beach to turn it off.

“Into this cross-shaped hole you will need to insert a corresponding cross-shaped key, and then turn this key to open the chest.”

« How to connect Oscar's heart?. First, insert Oscar's heart to replace the regular one. . Next, be sure to open the valves on the heart (there are two of them and they resemble caps). . Now insert the tubes into these open valves. . Now switch to the central ball and unscrew the bolt that prevents the heart from opening (unscrew it with a wrench).”
If you do everything correctly, then the main character will see and understand that she now needs to find another key with which she can start the automaton.
|
System requirements for the game Siberia
Minimum Requirements
Pentium II 450 MHz, 64 MB memory, video card with 16 MB
Walkthrough and codes for the game Siberia
You have a wonderful opportunity to visit old villages far from civilization. Just for a few moments, plunge into a fairy tale. You can experience all the amazing moments of the game while playing the most recognizable quest "Syberia".
The main character, Kate Walker, is a young lawyer at the large firm Universal Toy Company. Its director, Mr. Marson, instructs her to complete a very important task: to find the owners of a mechanical toy factory and sign a contract with them.
Kate arrives from New York to the French village and finds herself on the main street at the moment when the funeral procession of Anna Voralberg, the owner of the automaton factory, takes place.
So, at the hotel, Kate finds out that Anna has died, but she has an heir - her brother Hans. It is necessary to publish the will at the notary and find an heir. Now a fleeting business trip will turn into a long and interesting journey.
As a child, Anna's younger brother was injured and began to lag behind in development. He ran away in search of his dream - mammoths. For this he was cursed by his father and everyone around him thought that the boy had died. Only one sister knew about his whereabouts and corresponded with him. He sent her drawings of his designs. On her way, Kate will come across the inventions of a genius more than once. One of them will be the mechanical robot Oscar.
The plot of the game "Siberia" cannot be described in detail and convey all the sensations that you will get during the game. You will meet many different characters, you must overcome a bunch of obstacles, solve several riddles, meet a drunken astronaut, a mentally ill music fan, a finicky singer.
Controlling the game "Siberia" with the mouse. The graphics are not the best, but the game "Syberia" can please you with short videos. The characters' dialogues are quite complete and understandable, but not drawn out.
At the end of the game, Kate will achieve her goal, she will be promoted, married and live in the most beautiful house in New York.
The goal of the game "Siberia" is to set priorities in a person's life under the influence of complex factors. A good job becomes boring, a loved one cheats, an annoying mother who is only interested in her appearance. To comprehend and re-evaluate all this, you need to move away from the bustle of the city, away from people. And when the train takes our heroine into the distance, over time she becomes a completely different Kate Walker.

The best Quest/Adventure of all time is game Siberia. This game may also be known to you under the names Siberia, Siberia 1 or Syberia. She took the quest genre to a whole new level. Colorful, with extraordinary tasks, it drew everyone into a world where playing the game Siberia turned into a whole cult. Intricate tasks often lead to dead ends, but their solution is always logical! Completing the game Seberia is not just a quest, but also a full-fledged adventure that many people dream of. In order not to get confused in all the intricacies of the game, you can use the links below, where the full description is described.
Read useful information about the game Siberia:
Where I am?
You are on the page of the Siberia game, created in the Adventure genre, where you can find a lot of useful information. The game was released by Microids studio. The walkthrough of the game Siberia that we found will help you quickly solve in-game problems and get tips on difficult moments. Also, codes and cheats for the Siberia game are simply necessary for everyone who likes to receive free bonuses.
The game Siberia in Russia was localized by the 1C company, but this does not eliminate the need for a localization, because sometimes errors manifest themselves during the game, and the original version is always better than the remade one. And playing in your native language is more enjoyable. You can also play this game online with friends.
Reviews and feedback from readers will help you decide if a game is worth your time. Considering that the game was released on 2002-06-01, we can say that it belongs to the category of classics.
In addition to general information, you may need a variety of files. Use add-ons when you are tired of the main plot - they will significantly expand the standard features. Mods and patches will help diversify and improve the gameplay. You can download them in our file storage.
Oscar's hands
Near the train you will see a stranger who will hide in the factory building. Get on the train. Go to the bedroom where poor Oscar is sitting, whose hands were stolen. Untie Oscar and talk to him. Then pick up the metal sheers from the floor. Listen to the Kolhograd voice cylinder. Get off the train.
Return back to the giant. Pull the handle forward once. Take the stairs to the ledge of the second floor of the plant. Use pliers to widen the hole in the wall and climb inside. In the room, go forward and examine the shelves on the left. Take the spark plug. Return to the giant. Pull the handle back once. Get down to the ground.


- Desk audit: developments
- Conditions for performing the stern experiment
- System status and processes
- Alexey Sergeevich Obukhov development of student research activities
- Mars 4th planet of the solar system
- Human organ systems
- Experimental methods for recording elementary particles
- What is the Swedish match famous for?
- The best self-propelled howitzers Russian artillery
- Fedor Petrovich Litke: second circumnavigation of the world
- The first pharmacy was opened
- Creative competition: we enter the Faculty of Journalism of St. Petersburg State University Bachelor's training programs
- Management of a modern school using the example of creating an educational cluster
- What does individuality mean?
- What does a person’s individuality depend on?
- Issues of formation of a cluster education system in the Russian Federation
- Unified State Exam tests in literature What is included in the Unified State Examination in literature
- How to pay transport tax for legal entities
- Card for individual accounting of the amounts of accrued payments and other remunerations and the amounts of accrued insurance premiums Card for insurance premiums per year
- Error when filling in Contour