Fun experiences to do at home. The most spectacular experiences with household chemicals
And together with them learn peace and wonders of physical phenomena? Then we invite you to our "experimental laboratory", in which we will tell you how to create simple, but very interesting experiments for children.
Egg Experiments
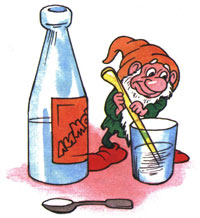
Salted egg
The egg will sink to the bottom if you place it in a glass of plain water, but what happens if you add salt? The result is very interesting and can clearly show interesting facts about density.
You will need:
- Salt
- Tumbler.
Instructions:
1. Fill half the glass with water.
2. Add a lot of salt to the glass (about 6 tablespoons).
3. We interfere.
4. We carefully lower the egg into the water and watch what happens.
Explanation
Salt water has a higher density than regular tap water. It is the salt that brings the egg to the surface. And if you add fresh water to the existing salt water, then the egg will gradually sink to the bottom.
Egg in a bottle

Did you know that a boiled whole egg can be easily placed in a bottle?
You will need:
- Bottle with a neck diameter smaller than that of an egg
- Hard boiled egg
- Matches
- Some paper
- Vegetable oil.
Instructions:
1. Lubricate the neck of the bottle with vegetable oil.
2. Now set fire to the paper (you can just have a few matches) and immediately throw it into the bottle.
3. Place an egg on top of the neck.
When the fire goes out, the egg will be inside the bottle.
Explanation
The fire causes the air in the bottle to heat up and escape. After the fire is extinguished, the air in the bottle will begin to cool and contract. Therefore, a low pressure is generated in the bottle, and the external pressure pushes the egg into the bottle.
Ball experiment

This experience shows how rubber and orange peel interact.
You will need:
- Balloon
- Orange.
Instructions:
1. Inflate the balloon.
2. Peel the orange, but do not discard the orange peel (zest).
3. Squeeze the orange zest over the ball and it will burst.
Explanation.
Orange peel contains the substance limonene. He is able to dissolve rubber, which is what happens with the ball.
Candle Experiment

An interesting experiment showing ignition of a candle at a distance.
You will need:
- Regular candle
- Matches or a lighter.
Instructions:
1. Light a candle.
2. Put it out after a few seconds.
3. Now bring the burning flame to the smoke coming from the candle. The candle will start burning again.
Explanation
The smoke rising up from an extinguished candle contains paraffin, which quickly ignites. The burning paraffin vapor reaches the wick, and the candle starts burning again.
Soda with vinegar

A balloon that inflates itself is a very interesting sight.
You will need:
- Bottle
- A glass of vinegar
- 4 teaspoons of baking soda
- Balloon.
Instructions:
1. Pour a glass of vinegar into the bottle.
2. Pour soda into a ball.
3. We put the ball on the neck of the bottle.
4. Slowly set the ball upright, while pouring the baking soda into the bottle with vinegar.
5. We observe how the balloon is inflated.
Explanation
When you add baking soda to vinegar, a process called soda quenching takes place. During this process, carbon dioxide is released, which inflates our balloon.
Invisible ink

Play with your child as a secret agent and create your invisible ink.
You will need:
- Half lemon
- Spoon
- A bowl
- Cotton swab
- White paper
- Lamp.
Instructions:
1. Squeeze some lemon juice into a bowl and add the same amount of water.
2. Dip a cotton ball into the mixture and write something on white paper.
3. Wait for the juice to dry and become completely invisible.
4. When you're ready to read a secret message or show it to someone else, heat the paper by holding it close to a light bulb or fire.
Explanation
Lemon juice is an organic substance that oxidizes and turns brown when heated. Diluted lemon juice in water makes it difficult to see on paper, and no one will know there is lemon juice in there until it warms up.
Other substances which work on the same principle:
- Orange juice
- Milk
- Onion juice
- Vinegar
- Wine.
How to make lava

You will need:
- Sunflower oil
- Juice or food coloring
- Transparent vessel (glass can be used)
- Any effervescent tablet.
Instructions:
1. First, pour the juice into a glass so that it fills about 70% of the container volume.
2. Fill the rest of the glass with sunflower oil.
3. Now we are waiting for the juice to separate from the sunflower oil.
4. We throw a pill into a glass and observe an effect similar to lava. When the tablet has dissolved, you can throw another one.
Explanation
The oil separates from the water as it has a lower density. Dissolving in the juice, the tablet emits carbon dioxide, which captures parts of the juice and lifts it up. Gas exits completely from the glass when it reaches the top, causing the juice particles to fall back down.
The tablet fizzes due to the fact that it contains citric acid and soda (sodium bicarbonate). Both of these ingredients react with water to form sodium citrate and carbon dioxide gas.
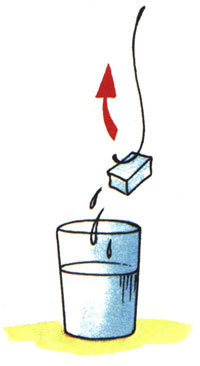
Ice experiment

At first glance, you might think that the ice cube, being on top, will eventually melt, due to which it should cause the water to spill, but is this really so?
You will need:
- Cup
- Ice cubes.
Instructions:
1. Fill the glass with warm water to the very rim.
2. Lower the ice cubes carefully.
3. Observe the water level carefully.
As the ice melts, the water level does not change at all.
Explanation
When water freezes, turning into ice, it expands, increasing its volume (which is why even heating pipes can burst in winter). The water from the melted ice takes up less space than the ice itself. So when the ice cube melts, the water level remains about the same.
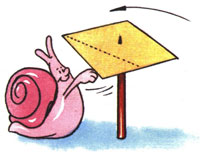
How to make a parachute

find out about air resistance, by making a small parachute.
You will need:
- Plastic bag or other lightweight material
- Scissors
- Small load (possibly some kind of figurine).
Instructions:
1. Cut out a large square from a plastic bag.
2. Now we cut off the edges so that we get an octagon (eight equal sides).
3. Now attach 8 strands of thread to each corner.
4. Remember to make a small hole in the middle of the parachute.
5. Tie the other ends of the threads to a small weight.
6. We use a chair or find a high point to launch the parachute and check how it flies. Remember that the parachute should fly as slowly as possible.
Explanation
When the parachute is deployed, the load pulls it down, but with the help of the lines, the parachute takes up a large area that resists the air, due to which the load slowly descends. The larger the surface area of the parachute, the more this surface resists falling, and the slower the parachute will descend.
A small hole in the middle of the parachute allows air to slowly pass through it rather than bouncing the parachute to one side.
How to make a tornado

Find out, how to make a tornado in a bottle with this fun science experiment for kids. The objects used in the experiment are easy to find in everyday life. Home made mini tornado much safer than the tornado that is shown on television in the steppes of America.
Summary: Chemical experience is invisible ink. Experiments with citric acid and soda. Experiments with surface tension on water. Mighty shell. Teach the egg to swim. Animation. Experiments with optical illusions.
Does your baby love everything mysterious, mysterious and unusual? Then be sure to conduct with him the simple, but very curious experiments described in this article. Most of them will surprise and even puzzle the child, give him the opportunity to see for himself in practice the unusual properties of ordinary objects, phenomena, their interaction with each other, to understand the reason for what is happening and thereby gain practical experience.
Your son or daughter will certainly earn the respect of their peers by showing them experiences as magic tricks. For example, they can make cold water "boil" or use a lemon to launch a homemade rocket. Such entertainment can be included in the birthday program for children of preschool and primary school age.
Invisible ink
|


Lemon inflates a balloon
|


Lemon launches a rocket into space
|


Spreading toothpicks
|


Mighty shell
|


Teach an egg to swim
|


"Bait" for ice
|


Can cold water "boil"?
|


Pipette straw
|


Straw flute
|


Rapier straw
|


Bird in a cage
|


How does a square turn into a circle?
|


Strong newspaper
|


Mighty breath
|


Record weight
|


Home chemists-scientists believe that the most useful property of detergents is the content of surfactants (surfactants). Surfactants significantly reduce the electrostatic voltage between the particles of substances and break down conglomerates. This property makes it easier to clean the clothes. In this article, there are chemical reactions that you can repeat with household chemicals, because with the help of surfactants you can not only remove dirt, but also perform spectacular experiments.
Experience one: a foamy volcano in a bank
It is very easy to carry out this interesting experiment at home. For him you will need:
hydroperite, or (the higher the concentration of the solution, the more intense the reaction will be and the more spectacular the eruption of the "volcano"; therefore, it is better to buy tablets in the pharmacy and immediately before use dilute them in a small volume in a ratio of 1/1 (you get a 50% solution - this is excellent concentration);
gel detergent for dishes (prepare about 50 ml of an aqueous solution);
dye.
Now you need to get an effective catalyst - ammonia. Add the ammonia liquid carefully and drop by drop until it is completely dissolved.
 Copper sulfate crystals
Consider the formula:
CuSO₄ + 6NH₃ + 2H₂O = (OH) ₂ (copper ammonia) + (NH₄) ₂SO₄
Peroxide decomposition reaction:
2H₂O₂ → 2H₂O + O₂
Making a volcano: mix ammonia with a cleaning solution in a jar or wide-necked flask. Then quickly pour in the hydroperite solution. The "eruption" can be very strong - it is better to substitute some kind of container under the volcano flask.
Experiment two: reaction of acid and sodium salts
Perhaps the most common compound found in every home is baking soda. It reacts with acid to create new salt, water and carbon dioxide. The latter can be detected by hissing and bubbles at the reaction site.

Experience three: floating soap bubbles
This is a very simple baking soda experience. You will need:
- wide bottom aquarium;
- baking soda (150-200 grams);
- (6-9% solution);
- soap bubbles (to make your own, mix water, dishwashing detergent, and glycerin);
Spread soda evenly over the bottom of the aquarium and fill it with acetic acid. The result is carbon dioxide. It is heavier than air and therefore settles at the bottom of the glass box. To determine if there is CO₂ there, lower a lighted match to the bottom - it will instantly go out in carbon dioxide.
NaHCO₃ + CH₃COOH → CH₃COONa + H₂O + CO₂
Now you need to blow bubbles into the container. They will slowly move along a horizontal line (the boundary of contact between carbon dioxide and air, invisible to the eye, as if floating in an aquarium).
Experience four: reaction of soda and acid 2.0
For experience you will need:
- different types of non-hygroscopic foods (for example, gummies).
- a glass of diluted baking soda (one tablespoon);
- a glass with a solution of acetic or any other available acid (malic,).
Cut the pieces of marmalade with a sharp knife into strips 1-3 cm long and place for processing in a glass with soda solution. Wait 10 minutes and then transfer the pieces to another glass (with an acidic solution).
The ribbons will become overgrown with bubbles of the resulting carbon dioxide and float upward. On the surface, the bubbles will evaporate, the lifting force of the gas will disappear, and the marmalade ribbons will drown, again become overgrown with bubbles, and so on until the reagents in the container run out.
Fifth experiment: properties of alkali and litmus paper
Most detergents contain caustic soda, the most common alkali. It is possible to reveal its presence in a solution of a detergent in this elementary experiment. At home, a young enthusiast will easily conduct it on his own:
- take a strip of litmus paper;
- dissolve a little liquid soap in water;
- dip litmus into soapy liquid;
- wait until the indicator turns blue, which will indicate an alkaline reaction of the solution.
Click to find out what other experiments on the determination of the acidity of the environment can be carried out from the materials at hand.
Experiment six: colored explosions in milk
The experience is based on the properties of the interaction of fats and surfactants. Fat molecules have a special, dual structure: hydrophilic (interacting, dissociating with water) and hydrophobic (water-insoluble "tail" of a polyatomic compound) end of the molecule.
- Pour milk into a wide container of shallow depth ("canvas" on which a color explosion will be seen). Milk is a suspension, a suspension of fatty molecules in water.
- Use a pipette to add a few drops of the water-soluble liquid dye to the milk container. You can add different dyes to different places of the container and make a multicolored explosion.
- Then you need to soak a cotton swab in liquid detergent and touch the surface of the milk. The white "canvas" of milk turns into a moving palette with colors that move in the liquid like spirals and twist into bizarre bends.
This phenomenon is based on the ability of surfactants to fragment (divide into sections) a film of fat molecules on the surface of a liquid. Fat molecules, repelling by their hydrophobic "tails", migrate in the milky suspension, and with them the partially undissolved paint.
Useful Tips
Children are always trying to find out something new every day and they always have a lot of questions.
They can explain some phenomena, but you can clearly show how this or that thing, this or that phenomenon works.
In these experiments, children not only learn something new, but also learn create differentcrafts, with which they will be able to play further.
1. Experiments for children: lemon volcano

You will need:
2 lemons (for 1 volcano)
Baking soda
Food colors or watercolors
Dishwashing liquid
Wooden stick or spoon (optional)

1. Cut off the bottom of the lemon so it can be placed on a flat surface.
2. Cut a piece of lemon from the back as shown in the image.
* You can cut off half a lemon and make an open volcano.

3. Take a second lemon, cut it in half, and squeeze the juice out of it into a cup. This will be your backup lemon juice.
4. Place the first lemon (with the cut out) on the tray and spoon the lemon inside to squeeze out some juice. It is important that the juice is inside the lemon.
5. Add food coloring or watercolor to the inside of the lemon, but do not stir.

6. Pour dish soap into the lemon.
7. Add a spoonful of baking soda to the lemon. A reaction will begin. You can stir everything inside the lemon with a stick or spoon - the volcano will begin to foam.

8. To make the reaction last longer, you can gradually add more baking soda, dyes, soap and reserve lemon juice.
2. Home experiments for children: electric eels from chewing worms

You will need:
2 glasses
Small capacity
4-6 chewing worms
3 tablespoons of baking soda
1/2 spoon of vinegar
1 cup of water
Scissors, kitchen or stationery knife.
1. Using scissors or a knife, cut lengthwise (exactly along - it will not be easy, but be patient) each worm into 4 (or more) parts.
* The smaller the piece, the better.
* If the scissors don't want to cut properly, try washing them with soap and water.

2. Stir water and baking soda in a glass.
3. Add pieces of worms to the water and baking soda solution and stir.
4. Leave the worms in the solution for 10-15 minutes.
5. Use a fork to transfer the worm pieces to a small plate.
6. Pour half a spoonful of vinegar into an empty glass and start placing the worms in it one by one.

* The experiment can be repeated if the worms are washed with plain water. After a few tries, your worms will begin to dissolve, and then you will have to cut a new batch.
3. Experiments and experiments: a rainbow on paper or how light is reflected on a flat surface

You will need:
A bowl of water
Clear nail polish
Small pieces of black paper.
1. Add 1 to 2 drops of clear nail polish to a bowl of water. See how the varnish disperses in the water.
2. Quickly (after 10 seconds) dip a piece of black paper into a bowl. Take it out and let it dry on a paper towel.

3. After the paper is dry (this happens quickly), start turning the paper and look at the rainbow that is displayed on it.
* To get a better view of the rainbow on paper, look at it in the sunlight.


4. Experiments at home: rain cloud in the bank

When small drops of water accumulate in a cloud, they become heavier and heavier. As a result, they will reach such a weight that they can no longer remain in the air and begin to fall to the ground - this is how rain appears.
This phenomenon can be shown to children using simple materials.
You will need:
Shaving foam
Food coloring.
1. Fill the jar with water.
2. Apply shaving foam on top - this will be a cloud.
3. Let the child begin to drip food coloring onto the "cloud" until it "rains" - the drops of color begin to fall to the bottom of the jar.
Explain this phenomenon to your child during the experiment.

You will need:
Warm water
Sunflower oil
4 food colors
1. Fill the jar 3/4 full with warm water.

2. Take a bowl and stir in 3-4 tablespoons of oil and a few drops of food coloring. In this example, 1 drop of each of the 4 dyes was used - red, yellow, blue and green.

3. Stir the dyes and oil with a fork.

4. Pour the mixture gently into a jar of warm water.

5. See what happens - the food coloring will slowly sink through the oil into the water, after which each drop will begin to scatter and mix with the other drops.
* Food coloring is water soluble, but not oil soluble. the density of the oil is less than water (that's why it "floats" on the water). A drop of dye is heavier than oil, so it will submerge until it reaches the water, where it begins to dissipate and resemble a small fireworks display.
6. Interesting experiences: ina bar in which colors merge
You will need:
- wheel printout (or you can cut your wheel and paint all the colors of the rainbow on it)
Elastic band or thick thread
Glue stick
Scissors
A skewer or screwdriver (to make holes in the paper wheel).

1. Select and print the two templates you want to use.

2. Take a piece of cardboard and use a glue stick to glue one template to the cardboard.
3. Cut the glued circle out of the cardboard.
4. Glue the second template to the back of the cardboard circle.
5. Use a skewer or screwdriver to make two holes in the circle.

6. Pass the thread through the holes and tie the ends into a knot.
Now you can spin your top and watch the colors merge on the circles.


7. Experiments for children at home: jellyfish in a jar

You will need:
Small transparent plastic bag
Clear plastic bottle
Food coloring
Scissors.

1. Place a plastic bag on a flat surface and flatten it.
2. Cut off the bottom and handles of the bag.
3. Cut the bag lengthways to the right and left to create two sheets of polyethylene. You will need one sheet.
4. Find the center of the plastic sheet and fold it like a ball to make a jellyfish head. Tie a thread around the jellyfish's neck, but not too tight - you need to leave a small hole to pour water into the jellyfish's head through it.
5. There is a head, now let's move on to the tentacles. Make cuts in the sheet - from bottom to head. You need approximately 8-10 tentacles.
6. Cut each tentacle into 3-4 more smaller pieces.

7. Pour some water into the jellyfish's head, leaving room for air to float in the bottle.
8. Fill a bottle with water and put your jellyfish in it.

9. Add a few drops of blue or green food coloring.
* Close the lid tightly to prevent water spilling out.
* Have the children turn the bottle over and watch the jellyfish swim in it.
8. Chemical experiments: magic crystals in a glass

You will need:
Glass tumbler or bowl
Plastic bowl
1 cup Epsom Salt (magnesium sulfate) - used in bath salts
1 cup hot water
Food coloring.
1. Pour Epsom salt into a bowl and add hot water. You can add a few drops of food coloring to the bowl.
2. Stir the contents of the bowl for 1 to 2 minutes. Most of the salt granules should dissolve.

3. Pour the solution into a glass or glass and place it in the freezer for 10-15 minutes. Don't worry, the solution isn't hot enough to crack the glass.
4. After freezing, transfer the solution to the main compartment of the refrigerator, preferably on the top shelf, and let it sit overnight.

The growth of crystals will be noticeable only after a few hours, but it is better to wait out the night.
This is what the crystals look like the next day. Remember that crystals are very fragile. If touched, they will most likely break or crumble immediately.

9. Experiments for children (video): soap cube
10. Chemical experiments for children (video): how to make a lava lamp with your own hands
Every child has a desire to learn about the world around him. Experiments are a great tool for this. They will be of interest to both preschoolers and children of primary school age.
Safety rules when conducting home experiments
1. Cover the work surface with paper or polyethylene.
2. During the experiment, do not bend over closely to avoid damage to the eyes and skin.
3. Use gloves if necessary.
Experience number 1. Dancing raisins and corn
Need: Raisins, corn kernels, soda, plastic bottle.
Experience: Soda is poured into a bottle. The raisins are lowered first, then the corn kernels.
Result: The raisins move up and down with the bubbles of sparkling water. But upon reaching the surface, the bubbles burst and the grains fall to the bottom.
Let's talk? You can talk about what bubbles are and why they go up. Pay attention that the bubbles are small in size, but they can carry along with them raisins and corn, which is several times larger.
Experience number 2. Soft glass
Needed: glass rod, gas burner
Experience progress: the rod heats up in the middle. Then it is torn into two halves. The half of the rod is heated by the burner in two places, gently bent in the shape of a triangle. The second half also heats up, one third is bent, then a ready-made triangle is put on it and the half is bent completely.
Result: the glass rod turned into two triangles linked to each other.
Let's talk? As a result of heat exposure, hard glass becomes ductile and viscous. And from it you can make different shapes. What Causes Glass to Become Soft? Why does the glass no longer bend after cooling down?
Experience number 3. Water rises on a napkin
You will need: a plastic cup, a napkin, water, felt-tip pens
The course of the experiment: the glass is filled with water by 1/3 part. The napkin is folded vertically several times to form a narrow rectangle. Then a piece of about 5 cm wide is cut from it. This piece must be expanded to make a long segment. Then step back from the bottom edge about 5-7 cm and begin to put large dots with each color of the felt-tip pen. A line of colored dots should form.
Then the napkin is placed in a glass of water so that the lower end with the colored line is about 1.5 cm in the water.
Result: water quickly rises up the napkin, painting the entire long piece of napkin with colored stripes.
Let's talk? Why isn't water colorless? How does it go up? The cellulose fibers that make up the tissue paper are porous, and water uses them as a way up.
Did you like the experience? Then you will also like our special materials for children of different ages.
Experience number 4. Rainbow out of the water
You will need: a container filled with water (bath, basin), a flashlight, a mirror, a sheet of white paper.
The course of the experiment: a mirror is placed on the bottom of the container. The light from the flashlight is directed to the mirror. The light from it must be caught on paper.
Result: A rainbow will be visible on the paper.
Let's talk? Light is the source of color. There are no paints and markers to color the water, sheet or flashlight, but suddenly a rainbow appears. This is a spectrum of colors. What colors do you know?
Experience number 5. Sweet and colorful
You will need: sugar, colored food paints, 5 glass glasses, a tablespoon.
The course of the experiment: a different number of spoons of sugar is added to each glass. In the first glass, one spoon, in the second - two, and so on. The fifth glass remains empty. In glasses, set in order, pour 3 tablespoons of water and mix. Then a few drops of one paint are added to each glass and mixed. In the first red, in the second - yellow, in the third - green, and in the fourth - blue. In a clean glass with clear water, we begin to add the contents of the glasses, starting with red, then yellow, and in order. It should be added very carefully.
Result: 4 multi-colored layers are formed in the glass.
Let's talk? More sugar increases the density of the water. Therefore, this layer will be the lowest in the glass. The red liquid has the least amount of sugar, so it will end up at the top.
Experience number 6. Gelatin figurines
You will need: a glass, blotting paper, 10 grams of gelatin, water, animal molds, a plastic bag.
The course of the experiment: pour gelatin into 1/4 cup of water and let it swell. Heat it in a water bath and dissolve (about 50 degrees). Pour the resulting solution onto the bag in an even thin layer and dry. Then cut out the figurines of the animals. Put on a blotter or napkin and breathe on the figures.
Result: The figures begin to bend.
Let's talk? Breathing moisturizes the gelatin on one side, and because of this, it begins to expand and bend. Alternatively: take 4-5 grams of gelatin, let it swell and then dissolve, then pour it onto the glass and put it in the freezer or take it out to the balcony in winter. After a few days, take out the glass, remove the thawed gelatin. It will have a clear pattern of ice crystals.
Experience number 7. Hairstyle egg
You will need: an egg shell with a conical part, cotton wool, felt-tip pens, water, alfalfa seeds, an empty toilet paper roll.
The course of the experiment: the shell is installed in the coil in such a way that the tapered part is down. Cotton wool is put inside, on which alfalfa seeds are poured and watered abundantly with water. You can draw eyes, nose and mouth on the shell and put it on the sunny side.
Result: after 3 days, the little man will have "hairs".
Let's talk? For grass to germinate, soil is not required. Sometimes even water is enough for sprouts to appear.
Experience number 8. Draws the sun
You will need: flat small objects (you can cut figures out of foam rubber), a sheet of black paper.
The course of the experiment: in a place where the sun is shining brightly, put black paper. Lay out stencils, figures, children's molds loosely on the sheets.
Result: When the sun goes down, you can remove objects and see the prints of the sun.
Let's talk? Black color fades when exposed to sunlight. Why did the paper remain dark in the places of the figures?
Experience number 10. Color in milk
You will need: milk, food colors, a cotton swab, dishwashing detergent.
The course of the experiment: a little food coloring is poured into the milk. After a short wait, the milk starts to move. It turns out patterns, stripes, swirling lines. You can add a different color, blow on the milk. Then a cotton swab is dipped in dish soap and lowered into the center of the plate. The dyes begin to move more intensively, mix, forming circles.
Result: various patterns, spirals, circles, spots are formed in the plate.
Let's talk? Milk is made up of fat molecules. When the agent appears, the molecules break apart, which leads to their rapid movement. Therefore, the dyes are mixed.
Experience number 10. Waves in a bottle
You will need: sunflower oil, water, bottle, food coloring.
The course of the experiment: water is poured into a bottle (slightly more than half) and mixed with a dye. Then ¼ cup of vegetable oil is added. The bottle is carefully rolled up and placed on its side so that the oil rises to the surface. We begin to swing the bottle back and forth, thereby forming waves.
Result: waves are formed on the oily surface, like at sea.
Let's talk? The density of oil is less than that of water. Therefore, it is on the surface. Waves are the top layer of water moving due to the direction of the wind. The lower layers of water remain stationary.
Experience number 11. Colored drops
You will need: a container with water, containers for mixing, BF glue, toothpicks, acrylic paints.
The course of the experiment: BF glue is squeezed out in a container. A certain colorant is added to each container. And then they are alternately placed in water.
Result: Colored droplets are attracted to each other, forming multicolored islands.
Let's talk? Liquids with the same density are attracted, and with different densities are repelled.
Experience number 12. Draw with a magnet
You will need: magnets of different shapes, iron filings, a sheet of paper, a paper cup.
The course of the experiment: put the sawdust in a glass. Place the magnets on the table and cover each with a sheet of paper. A thin layer of sawdust is poured onto the paper.
Result: Lines and patterns form around the magnets.
Let's talk? Every magnet has a magnetic field. This is the space in which metal objects move as the attraction of a magnet dictates. A circle is formed near the round magnet, since its field of attraction is the same everywhere. Why does a rectangular magnet have a different sawdust pattern?
Experience number 13. Lava lamp
You will need: Two glasses, two effervescent aspirin tablets, sunflower oil, two types of juice.
The course of the experiment: the glasses are about 2/3 full of juice. Then sunflower oil is added so that three centimeters remain to the edge of the glass. An aspirin tablet is thrown into each glass.
Result: the contents of the glasses will begin to fizzle, boil, and foam will rise.
Let's talk? What kind of reaction does aspirin cause? Why? Do the layers of juice and oil mix? Why?
Experience number 14. Box rolls
You will need: a shoe box, a ruler, 10 round markers, scissors, a ruler, a balloon.
Experience progress: a square hole is cut in the smaller side of the box. The ball is placed in the box so that its hole can be pulled out of the square a little. You need to inflate the balloon and pinch the hole with your fingers. Then put all the markers under the box and release the ball.
Result: While the balloon is deflating, the box will move. When all the air is gone, the box will travel a little more and stop.
Let's talk? Objects change the state of rest or, as in our case, uniform motion in a straight line, if force begins to act on them. And the desire to preserve the previous state, before the impact of force, is inertia. What is the role of the ball? What force prevents the box from moving on? (friction force)
Experience number 15. false mirror
You will need: a mirror, a pencil, four books, paper.
The course of the experiment: the books are stacked, and a mirror is leaning against them. Paper is placed under its edge. The left hand is placed in front of the piece of paper. The chin is placed on the hand so that you can only look in the mirror, but not at the sheet. Looking in the mirror, write your name on the paper. Now look at the paper.
Result: Almost all letters are inverted, except for symmetrical ones.
Let's talk? The mirror changes the image. Therefore, they say "in a mirror image." So you can come up with your own, unusual cipher.
Experience number 16. Living mirror
You will need: a straight transparent glass, a small mirror, scotch tape
The course of the experiment: the glass is attached to the mirror with tape. Water is poured into it to the brim. You need to bring your face closer to the glass.
Result: The image is reduced. By tilting your head to the right, you can see in the mirror how it tilts to the left.
Let's talk? Water refracts the image, and the mirror distorts a little.
Experience number 17. Flame print
You will need: a tin can, a candle, a sheet of paper.
The course of the experiment: the jar must be tightly wrapped with a piece of paper and kept in the candle flame for several seconds.
Result: removing the sheet of paper, you can see an imprint on it in the form of a candle flame.
Let's talk? The paper is tightly pressed against the can and does not have access to oxygen, which means it does not burn.
Experience number 18. Silver egg
You will need: wire, a container of water, matches, a candle, a boiled egg.
The course of the experiment: a stand is created from the wire. A boiled egg is peeled, put on a wire, a candle is placed under it. The egg is evenly turned over until it is smoked. Then it is removed from the wire and lowered into the water.
Result: After a while, the top layer peels off and the egg turns silvery.
Let's talk? What changed the color of the egg? What has it become? Let's cut it open and see what it looks like inside.
Experience number 19. Saving spoon
You will need: A teaspoon, a glass mug with a handle, twine.
The course of the experiment: one end of the string is tied to a spoon, the other end to the handle of the mug. The string is thrown over the index finger so that there is a spoon on one side, a circle on the other, and released.
Result: The glass will not fall, the spoon, having risen up, will remain near the finger.
Let's talk? The inertia of a teaspoon saves the mug from falling.
Experience number 20. Painted flowers
You will need: flowers with white petals, water containers, a knife, water, food coloring.
The course of the experiment: the containers must be filled with water and a certain dye must be added to each. One flower should be set aside, and the rest should be trimmed with a sharp knife. This should be done in warm water, obliquely at an angle of 45 degrees, by 2 cm. When moving flowers in a container with dyes, you need to pinch the cut with your finger so that air jams do not form. After putting flowers in containers with dyes, you need to take the deferred flowers. Cut the stem lengthwise into two to the center. Place one part of the stem in a red container, and the other in a blue or green container.
Result: the water will rise up the stems and color the petals in different colors. This will happen in about a day.
Let's talk? Examine every part of the flower to see how the water rose. Are the stem and leaves painted over? How long will the color last?
We wish you an exciting pastime and new knowledge while conducting experiments for children!
Experiments were collected by Tamara Gerasimovich


 Creativity")


- Secrets of the origin of Georgian, Armenian and Azerbaijani surnames Who has a surname ending in yang
- Leonardo di ser piero da vinci artworks
- Tickets for Christmas trees New Year's performances for children circus
- Then Gia Eradze's Burlesque show is for you!
- Before his death, Murat Nasyrov was in euphoria and dreamed of performing at the Eurovision Song Contest Murat Nasyrov sang to which group
- Taisiya Povaliy: biography, personal life, children, musical career, photo
- Justin Timberlake: biography, personal life, family, wife, children - photo American city where Justin Timberlake was born
- Tori Karaseva after the project Victoria Karaseva husband and children
- Glinka's biography and work (briefly)
- Step by step drawing basics
- Learn to draw a person with a pencil: step by step instructions
- Bang bang is running away my bunny
- Secrets of forecasting in Gosloto: the choice of numbers
- Lottery results 6 out of 49
- Secrets of forecasting in Gosloto: the choice of numbers
- Gosloto 7 of 49 results
- Where to buy a lottery ticket
- Why is half of the prize pool distributed?
- Features of the distribution of the lottery prize fund
- Play lotomaty cosmolot online