How to draw a beautiful Christmas tree step by step. Drawing a New Year tree in the middle group step by step with photos
There is a little less than a month left until the New Year, we are preparing gifts and drawing cards. And you? If yes, then two Christmas trees are waiting for you in this lesson. Lovers of handicrafts feel especially inspired before the holidays, because their creative impulses can be channeled into making gifts and cards. Handmade cards, even the simplest ones, evoke very warm feelings among loved ones. And how grandmothers admire the creations of their grandchildren!
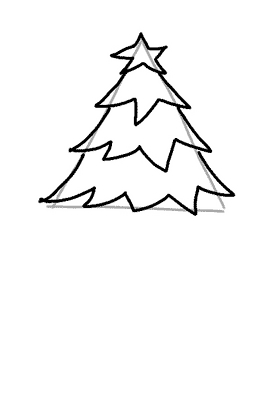
I won't tell you how to make the card itself, but I'll show you how to draw Christmas tree for a postcard. More precisely, even 2 New Year trees. They are both quite simple, they can be drawn by both adults and children.
In the first case, the design of the Christmas tree is simpler and more understandable for children, and the decorations can be more complicated. You can decorate the Christmas trees in a newfangled style, as I did, or in your own way.
Herringbone silver
It is silver because I drew on the card with silver markers and an outline. But more on that later.
I didn't use a pencil for drawing. Look at the diagram to understand how to draw a Christmas tree step by step. Before drawing on a postcard, you can practice drawing with a pencil or marker. In my case, the blue training herringbone was made with a regular thin marker.
On the diagram, each new step marked in red.

- For four tiers, you need to mark 5 dividing points vertically in the middle of the future Christmas tree. Don't forget to leave some free space at the top and bottom. If you plan to draw a high tip on the top of the head, then leave more space.
- Imagine how the lines expand from the top point down, forming a triangle. By the way, if it is more convenient for you to make a preliminary border for the Christmas tree, then mark the triangle with a pencil. We draw the upper tier, but not as a triangle, but as a bell, slightly bending the corners of the base upward and lowering the lower border in the center in an arc.
- — 5. We draw the remaining tiers like skirts, also raising the corners and lowering the lower border in an arc. 6. All that remains is to draw the tip and the leg (optional).
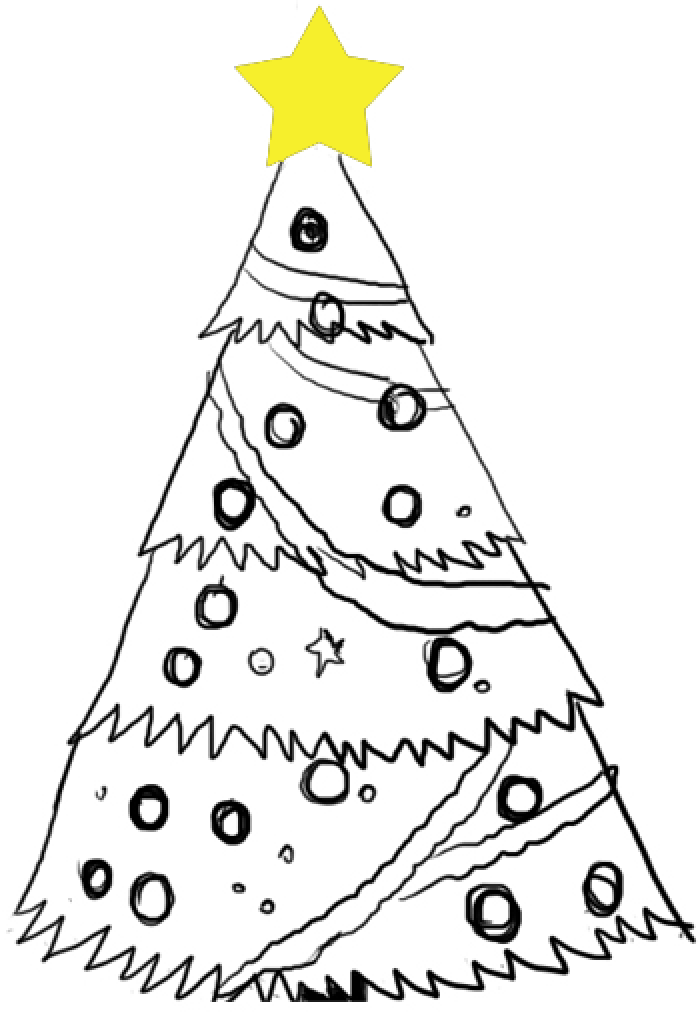
So our form is ready, which can now be filled with different patterns. My Christmas trees are filled with different doodles - circles, curls, flowers, in free form, asymmetrically. And around it I drew curls and snowballs to make it more elegant.

Christmas tree in doodle art style made with thin markers of two colors
You now know how to draw a simple Christmas tree.
Children also enjoy drawing such a Christmas tree. They can be asked to draw a Christmas tree with colored markers or pencils. Of course, in this case you need to draw all the “skirts” with a simple pencil, and only then start coloring. In the Zenart and graphics section there are ready-made coloring pages Christmas trees for children of different ages, as well as coloring templates for Christmas trees in the doodling style. And here's what we got.

children's drawing for this lesson
Postcard with a silver Christmas tree in doodart style
Now I’ll tell you about the postcard. I took dark thick paper with a beautiful texture from the album. I marked the size of the card and cut it out. Dark paper is a little fussy. Therefore, before drawing, I washed and dried my hands, so as not to leave fingerprints, and placed a sheet of paper under my hand. I marked the points with a pencil and then with a white marker. I did not draw the borders of the Christmas tree, because erasing the pencil with an eraser leaves marks on the paper that spoil the whole look.

Next, I drew the skirts with a white marker (here from ZIG). I filled them with silver patterns made with a gel pen. And I added a few more special effects, which, unfortunately, are not very visible in the photo: I decorated some details with finely dispersed holographic sparkles, and also added dots with a silver volumetric outline.
The card turned out stylish and elegant. Inside, I decorated the corner with a pattern in the same style using a silver gel pen. I pasted a square of thick light paper - this is a place to write congratulations.

And now the promised second lesson - how to draw a Christmas tree step by step, but in a different version.
Christmas tree green
This Christmas tree may seem a little more complicated, so I also advise you to first sketch out the sketch with a pencil in a smaller version several times, so that you can easily draw it on a postcard. After all, as you understand, it is better to make as few erasures and markings as possible on a postcard, then the paper does not deteriorate and the drawing looks neater. But in this version it is more difficult to do without a pencil. I laid the outlines on the pencil markings with a marker, and before painting the Christmas tree, I erased the visible parts of the pencil sketch.

- Draw a cone with a pencil. Do you like to use a ruler? Please, you can use a ruler - corner.
- We draw stripes with a pencil.
- Before drawing the Christmas tree itself, you can already draw a tip with a marker, it will cover the very top of the head.
- Now we draw the outlines of the tiers of the Christmas tree with a marker, and erase the pencil sketch where it is visible. If you draw with a gel pen, let it dry before you erase the pencil.
- We draw the outlines of Christmas tree decorations, for example, with colored markers or pencils.
- Filling the space between toys green, also with felt-tip pens, markers or pencils.
We do not paint the ribbons, this is a decorative effect. How to draw a New Year tree so that it is festive and elegant? Add some shine! This is how our Christmas tree turned out.

We took yellow single-sided cardboard on which we drew Christmas trees, some contours were outlined with silver and gold gel pens, so the decorations play beautifully in the light. Especially beautiful flickering under artificial light. You can also use glitter gels to children's creativity.
Next, we cut out a rectangle with a Christmas tree and pasted it onto a card made of decorative paper. By the way, you can draw a Christmas tree on self-adhesive paper, so that you can also glue it onto a blank for a postcard.
That's all for today! If you liked it, leave a review in the comments. I remind you that you can send your creations to our club’s VKontakte feed vk.com/zenarts
Drawing a Christmas tree: drawing a Christmas tree with felt-tip pens with children
The master class is conducted by Vera Parfentyeva, a reader of the Rodnaya Pathinka website, a technology teacher, the head of a children’s creativity group, and a participant in our Internet Workshop of educational games “Through play - to success!”
Invite your child to draw as a gift to a friend, relatives, friends New Year's card with elegant Christmas trees, with balls, beads, beautiful toys!
Before drawing, look at the Christmas tree in the picture with your child: it has a trunk (what color and shape it is), and green fluffy thorny branches. The crown of the Christmas tree is prickly, with needles, similar in shape to a triangle: at the bottom it is wide, and at the top at the top of the tree it is narrow. The branches do not come from the very bottom of the tree, but start a little higher, so below, near the ground, we see the trunk of the tree.
Drawing a Christmas tree with children using felt-tip pens: materials and tools
To work you need:
- white album sheet,
- felt-tip pens,
- a simple pencil,
- ruler.
Drawing a Christmas tree with children using felt-tip pens: step-by-step description
When drawing a Christmas tree this way with young children, give your child ready-made template. Have him trace it (instead of step 1 and step 2).
Step 1
Fold the album sheet in half. Draw an isosceles triangle in the center.
To do this, draw a thin vertical line in the center of the postcard, barely visible to the eye. Place a point at the top of the line - the vertex of the triangle. At the bottom of the postcard, draw a horizontal line, on which, from the thin line to the left and right, set equal segments, for example 4 cm each. Connect their ends to the top. Thus, we obtain an isosceles triangle, i.e. a triangle in which two sides are equal to each other with a base of 8 cm.

Step 2
Draw a rectangle or square of your choice under the Christmas tree, also focusing on the central thin line - this is the trunk of the Christmas tree.

Step 3
In the background behind the Christmas tree, draw two more triangles.

Step 4
And now the real thing begins interesting job! You need to get creative and come up with outfits for the Christmas trees. In the article we give examples of outfits for Christmas trees; you can come up with other Christmas tree outfits.
Divide the central Christmas tree with inclined stripes. As a result, we get the following cells.

Step 5
Select green markers and paint the resulting cells with green markers of two shades in a checkerboard pattern.


Or you can first draw, for example, balls and beads in each cell on a white background with bright felt-tip pens, and then paint the remaining spaces in the cells green. We will try this option in the next step.
Step 6
Let's draw circles on one Christmas tree different sizes. And on the other there are wavy lines going from top to bottom.

Step 7
Color the circles according to your design. And fill in the space in the triangle between the circles with a green felt-tip pen of a different shade so that this Christmas tree does not merge with the first one.

Step 8
Color the wavy lines with green markers of different shades. Between the lines, draw circles, diamonds, stars - whatever your imagination tells you.

Step 9
Color the distance between the wavy lines with different shades Green colour. Paint over the trunk brown markers 2 – 3 shades. We draw lines from top to bottom. Decorate the central Christmas tree as your imagination dictates. Or you can glue multi-colored sequins.

Our card is ready! We admire the beauty and put the card in the New Year gift box! Seven-year-old Nastya came up with these outfits for Christmas trees.

Creative task:
— What techniques can be used to design such a postcard?
— Draw triangular Christmas trees and color them with paints or pencils. Or you can combine several methods at once, for example, paints with felt-tip pens, or crayons, or all methods together. Imagine!
— Make triangular Christmas trees using the appliqué technique from colored paper and decorate them with sequins, beads, beads, and rhinestones. You will learn how to make an original triangular Christmas tree applique for a postcard from the article.
— Learn poems about the Christmas tree with your child New Year's holiday. You will find a selection of 38 poems about the Christmas tree for children from 2 to 7 years old in the article.
Good luck in your creativity!!!
Drawing a Christmas tree: ways to draw a Christmas tree with paints and pencils
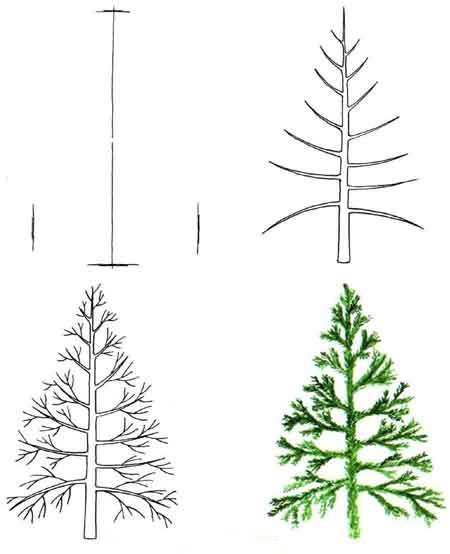
There are many ways to depict a Christmas tree. Below in the pictures you will see some of them. But you can come up with your own method based on the data below in the tables and pictures. Imagine, try, don’t be afraid to experiment! Think about what character your Christmas tree will be, how you will reflect this in the line, in its shape, color.
Drawing a Christmas tree with paints and pencils: the first drawing method

Drawing a Christmas tree with paints and pencils: the second drawing method

I have chosen carefully several schemes for drawing a Christmas tree various levels of difficulty. Choose the one you like best.
Some of the schemes are in this video!
Method 1
Although the method is the most difficult, but this Christmas tree quite cute. And considering that all kinds of gifts are conveniently nestled under it, it’s absolutely wonderful. This diagram demonstrates how to draw such a Christmas tree step by step.
Method 2
And this is the real one forest beauty, lush, luxurious and so beautiful! I hope the diagram won't be too complicated for you.

Method 3
Here is another New Year tree with big asterisk. You shouldn’t forget about her either. This decoration has already become traditional!


Method 4
This diagram shows in great detail the process of creating a small New Year's masterpiece. First you need to draw a triangle, and on its top a beautiful star.


The Christmas tree needs to hold on somehow. I suggest putting it in a bucket.

All that remains is to add some decorations, toys, bows and, of course, color. Carefully color the Christmas tree. That's all!


Method 5
This tree is based on a large triangle. Attached to it stand, branches, decorations.

Method 6
Another good scheme and again with gifts=)

Method 7
And this one is not bad, slender, curvy, easy to perform. But it's your choice!)

Method 8
The last diagram will help you learn how to draw a Christmas tree in the most naturalistic form.
It seems we have sorted out the Christmas trees. If you don't really love paint, you can make it from paper, cardboard or fabric. You will find interesting tips on how to do this in.
Now we will look at how to draw a Christmas tree in three versions with a pencil step by step.
First try to draw this Christmas tree, if it is difficult there are two easy options below.
Draw the remaining part, erase the auxiliary triangle.

We draw part of the trunk and the bucket (pot) where the tree stands.

We have a New Year’s tree, which means we need to decorate it with garlands and New Year’s toys.

Let's decorate.

Below are 2 simple options.


The Christmas tree is beautiful and glowing with lights. We love dressing her up for the New Year. We hang beautiful garlands on it, New Year's toys, we install the star at the very top. And underneath, when we woke up after the New Year, many, many gifts await us under the tree. The New Year tree is a symbol of the New Year and an integral attribute that stands in every home, apartment, and family. There are natural and artificial Christmas trees at home. For the New Year, the tree must be decorated, so the whole family decorates it, because it is big. A natural Christmas tree smells pleasant and refreshes the air at home. We also buy small Christmas tree branches and decorate them. When drawing a New Year tree, the main thing is to correctly establish its center and draw lines from it to the left and right, showing its branches. Then we show the fluffiness with wavy lines from below and again towards the line, and so on. Then you need to show the trunk of the Christmas tree below and draw a lot of toys. That's it, everything worked out for you. Have you been thinking all day: “How to draw a Christmas tree?”.. Watch many more drawing lessons about the New Year.
Master class on drawing for children 4-5 years old “Christmas tree”
Author: Victoria Aleksandrovna Ostanina, teacher of the Children's Preschool Educational Institution DS KV "Raduga" JV "Silver Hoof"
Description: Let's draw! This master class gives you the opportunity to take gouache, brushes and start painting! What do we especially want to draw on the eve of the wonderful New Year holiday? Of course a Christmas tree! What to do if you’re not very good at drawing, but you really want to? I offer you a very easy and simple drawing method: the “poke” method. Don't be afraid to try, start drawing!
Purpose: The master class provides a wonderful opportunity to teach children how to draw a Christmas tree. Every educator, teacher primary classes can safely introduce drawing using the “poke” method into his work. And caring parents can draw small Christmas trees and large spruces together with their children!
Materials: White list paper, gouache, brushes, glass of water, cloth napkin.

Progress:
Soon, soon he will come to us
Happy New Year!
You and I will dream
And choose gifts!
To make the holiday brighter
I didn't forget about the Christmas tree!
Here are the toys with tinsel
We hung with you!
May good Grandfather Frost
Our wizard red nose!
All the guys in order
Gives out chocolate!
This is probably what every boy and every girl dreams of. New Year. I really want the holiday to come to us as quickly as possible! What is needed for this? We need a Christmas tree! And Christmas trees grow in the forest!

I just remembered my childhood! Early on a bright morning, my grandfather and I always went into the forest to pick a Christmas tree. We tried to choose the most beautiful one!

And at home they dressed her up. Everyone tried to choose the most beautiful and favorite toy and tried to hang it on the most visible
place! This is the beauty we got.

I would like to say in the words of Elena Ilyina:
"Look
Through the crack of the door -
You'll see
Our Christmas tree.
Our Christmas tree
tall,
Enough
To the ceiling.
And on it
Toys hanging -
From the stand
Up to the top..."
But now in our modern developing world there is no need to go into the forest, you just have to stand on a chair and take out from the closet a magic box in which an artificial Christmas tree is stored.

And now the toys...

Now let's decorate the Christmas tree.

And no going into the forest, no magic. But you can make the world brighter without destroying a single Christmas tree! How, you ask? Just! You need to plant a Christmas tree under your window! And dress her up every year!

And I suggest you draw a forest beauty. It's easy and simple to do! I suggest using a simple drawing method for work - the “poke” method.
Basic rules for drawing using the “poke” method:
1. Paint with a hard semi-dry brush. This means that we do not put the brush in water before applying gouache to the brush.
2. After washing off the paint from the brush, blot the brush on a cloth. This is necessary to keep the brush semi-dry.
3. To apply the drawing, we do not apply it with traditional strokes, but poke it into a sheet of paper, holding the brush vertically. Hence the name - the “poke” method.
4. After putting paint on the brush, the first “poke” should be made on a spare piece of paper, as this will allow the drawing to be more uniformly colored. The first “poke” always leaves a brighter mark, which is not always necessary in work.
5. When drawing a large object, such as the body of an animal, it is important to first follow the outline and then start filling in the middle.
After familiarizing yourself with the basic rules, you can begin to work.
Drawing a Christmas tree:
1. Let's start working with an image of the trunk of a Christmas tree. To do this we need brush No. 3 squirrel.
First we draw the trunk itself. We make the crown thinner, and thicken it towards the bottom of the trunk, applying strokes close to each other. I start each stroke from the top of the head and smoothly lead to the very bottom, spreading it to the sides. Now we draw branches - small semi-arcs, starting from the trunk and spreading to the sides.

2. Now we draw the needles. We do this in an unusual and interesting way - the “poke” method. Let's not forget about the rules.
We start work from the base of the branch.

And so we continue until the very end. And so on each side of the branch, making it fluffier with each “poke”.

3. We do the same with each branch. First, on one side of the tree,

Then the second side, trying to make the parallel branches the same.

4. Now, using darker gouache, add bright colors along the bottom of each branch.

5. Every Christmas tree in winter forest falls under snowfall, and snowflakes and even a lot of fluffy snow remain on her paws. This is exactly why we need white gouache and a hard semi-dry brush. Using the “poke” method again, we draw fluffy snow on the top of each branch.

The Christmas tree is ready. We will make a frame. To do this, we will use blue gouache and draw a frame using the “poke” method. Positioning the “poke” tightly to each other right near the edge of the sheet. Try to take your time so that the frame turns out dense and bright. Now our Christmas tree is ready.

It will become a worthy decoration of our home on the eve of the most beloved holiday for all children.

Whatever place we find for her, she will definitely please us!

Even a child can draw such a Christmas tree. This is how Vanya, 5 years old, saw and drew a Christmas tree.

You can decorate our Christmas tree by hanging painted tinsel and balls on it.

Or draw a whole forest.

Show your imagination. Don't be afraid to experiment!


")


- Abstract: Elementary particles
- Presentation on the topic "management"
- History of the development of computer technology presentation for a lesson on the topic Historical development of computer technology presentation
- Astronomy Presentations Interesting Topics for Astronomy Presentations
- Presentation on history "counting years in history"
- Astronomy Presentations Astronomy Presentation Template
- The anniversary of the expulsion of the Karachais recalled the problem of rehabilitation of repressed peoples
- Udmurt people What peoples live on the territory of Udmurtia
- Russia is a multinational state We live in a multinational country
- The smallest peoples of the world Which group of peoples is the smallest
- How to change a cash receipt order in 1c
- Day of Remembrance of Fallen Russian Internal Affairs Officers Heroism of Police Officers
- Northern coast of Neva Bay
- Enviable beauties in politics (17 photos)
- The best ballet performances
- Biography, political activity
- The magical world of crystals
- How to salt milk mushrooms: a quick recipe
- Ten Surprisingly Profitable Illegal Trades
- Management project based on the example of an enterprise presentation